Sunday, August 8, 2010

Blackberry Oat Buckle


I've been eyeing all the blackberry bushes in my area over the last couple weeks. With the abundance of rain we had late in spring, combined with my areas already high water table, I figured this season would be filled with plump juicy blackberries that would certainly find their way to my table. Over the weekend I couldn't wait any longer and took a little trip down Hwy 29 to see what I could find. Unfortunately they were all growing on pretty steep embankments, and I wasn't eager to repeat my spill last year when I slid down a blackberry hill (note: it's not the falling, but the getting back up that hurts the worse), so I just got what I could from the slightly less treacherous parts. Even with that restriction, it only took 30 minutes, and about twenty thorn scrapes, to have three and a half cups of bulging berries tucked away in my bag. Of course that not counting the ones I ate along the way!

From what I saw, only about half the berries on the bushes were ripe last Saturday. I'm sure there will be several more trips down to the patch before the season is over. Here is the first of my recipes involving one of my favorite parts of summer.

Blackberry Oat Buckle

Recipe adapted from
Cory Shreiber's
Rustic Fruit Desserts: Crumbles, Buckles, Cobblers, Pandowdies, and More

Ingredients

1 tbsp. butter for pan
1.5 cups flour
.5 cups oat flour
1 tsp. baking powder
.5 tsp. baking soda
.75 cups butter
1 cup sugar
2 eggs
1 tsp. vanilla extract
1 cup buttermilk
2.5 cups blackberries
.25 cups rolled oats
2 tbsp. brown sugar

Directions

1) Preheat oven to 350 and butter a nine inch square backing dish

2) Mix the regular flour, oat flour and backing soda. If you don’t have oat flour, simply chop up regular oats (aka oatmeal) in a food processor until it resembles a coarse meal.

3) In a separate bowl, cream together the butter and white sugar with a hand held mixer at high speeds until light and fluffy. Add the eggs one at and time and then the vanilla.

4) Stir the flour mixture into the butter/sugar mixture in three additions, alternating with the butter milk. Start and end with the flour mixture. The resulting batter will be much lighter/airier than a normal cake mix.

5) Fold in half of the blackberries and pour the mixture into the prepared pan.


6) Sprinkle the top of the buckle with the remaining berries, oats and brown sugar. Bake for 50 minutes or until a toothpick inserted into the cake comes out clean.


This cake can be served right away with ice cream as a wonderful dessert. The blackberries stay nice and juicy inside and ooze a bit when the buckle is sliced. It's also good the next morning without the ice cream as a delectable coffee cake. Its not an overly sweet buckle so you don't feel like you've started the day off with a sugar rush. Also feel free to substitute your favorite berry or even a mix of berries!

Monday, August 2, 2010

Squash Update

Well, my squash patch may have died off once early in the season, but the second time seemed to take. The sea of green is making our front yard look a little more planned.

Up front is the strawberry patch that has grown in nicely.

As you can probably imagine from the above photo, it's pretty easy to miss a growing squash. I've been trying to go out and tip toe amongst the squash every couple of days to see how things are progressing, but I still seem to end up with over grown summer squashes. Luckily, they still taste pretty good even when they get big. Here are some close ups from my last tip toe.


A handsome Peter Pan squash ready for the frying pan.


This is either Honey Boat or a Pumpkin. We planted them right next to each other...bad idea.


This one is my favorite. A four inch long Butternut Squash. So cute!!


This is a new experiment, Papaya Squash. What I find intriguing about them is that they are almost a neon yellow and VERY shiny.

This is my rather large Spagetti Squash. It hasn't even started to ripen yet and it's already bigger than I'm used to seeing.


Last but not least we had a Yellow Crookneck Squash. I believe this one is going in a chicken soup tonight!

Thanks for coming with me on a walk through my squash patch. While I am pretty happy with how it's turned out, next time I might space them further apart to make harvesting easier. Then again....

Tuesday, July 27, 2010

Nail Polish


So if you know me very well you might be asking yourself, why does the girl who hates feet have a picture of her own feet on her blog. Well my friends, don't think I didn't ask myself a similar question as I was taking this picture earlier today. The answer is, I found a great new nail polish which fits in with the less chemically lifestyle I've been trying to live. You see, I do my nails every week. It's not a chore really because in addition to the fact that I can't tolerate chips in my polish, I actually enjoy the process. What I have never enjoyed however, is the smell. By the time you're done you feel like you just huffed a tube of glue and if your significant other happens to be in the room then so do they. Enter, water based nail polish (ta da)!

Water based nail polish has a lot of things going for it. First, it has no smell. Literally, none. The remover also has practically no smell, or you can also just use some good ol' fashioned grain alcohol. Both work just fine. Second, going hand in hand with the no smell is the lack of harsh chemicals in water based nail polish. No solvents involved. Third, it comes in a wonderful variety of colors just like regular nail polish.  Finally, depending on the company you go with, it's not much more expensive than a normal high quality nail polish.

There are only two negatives I can think of regarding water based nail polish. First, it does not wear as well as regular polish. If I was using it for my hands I would be very disappointed because it chips a lot fast than regular. On my feet however, it lasts perfectly for at least a week and for me that's plenty. Its definitely worth having to touch up my nails to not have to endure regular polish smell. Also, you can combat the chipping by making sure your nails are clean and dry before you begin, and doing it before bed so they have all night to cure. Second, it takes a little longer to take off. I noticed this more at first than I do now, but you will spend a little more time rubbing to get it off. I think over time you just figure out how to rub better and how much remover you need on the cotton swab.

If you're interested in learning more about water based nail polish or wish to order some you can find it here.

Thursday, July 15, 2010

Simple Sauce

Being a tomato lover who lives with a raw tomato hater, I have had to adjust. Big juicy slices of raw tomato sprinkled with salt no longer cuts it as a veggie option at dinner time, so I've had to come up with new ways to incorporate my lovely beauties into meals other than just slicing them. One that I've become quite fond of, is making a fresh chunky sauce out of them. It can go over just about anything from pasta to fish. This is an especially good use for tomatoes that are left over from other meals (such as burgers) and are about to go bad. Last night I cooked up this sauce and then quickly cooked two tilapia fillets in it. Yum.

Simple Sauce

3-4 Roma tomatoes (or whatever you have lying around)
2 tbsp. of olive oil
1 tsp. each of assorted dried Italian herbs (basil, oregano, parsley)
.5 tsp. of dried rosemary and thyme
a small handful of Parmesan cheese
several gloves of garlic or the dried equivalent
salt and pepper to taste

1) In the pan of your choosing add the olive oil, all the herbs/spices and Parmesan cheese. I used the shaved Parmesan and chopped it so that it was finer. If you are using the powdered Parmesan, a couple good shakes should do.
2) Roughly chop the tomatoes and add them to the pan.
3) Cook over medium heat until the tomatoes are nice and hot. Really once this happens you can stop anytime. The longer your cook, the less chunky your sauce with be so go with your mood. I prefer it just barely cooked because you can really taste the freshness of the tomatoes, but if you cook it longer it will more closely resemble store bought sauce in texture.

Friday, July 9, 2010

Fruits of Our Labor

I know my mother already has a ripe tomato sitting on her counter, but I'm still very excited for this little guy.


He is my first of the season to set. In fact, I was just going out to take a picture of the fact that one of my tomatoes was finally flowering, and instead found this little guy sunning himself in the early morning rays. While many of my tomatoes appear to finally be getting their growth spurts, a few seem to be destined for the green waste bin. This includes my German Lunchbox tomato which hasn't grown at all over the last month and is now turning yellow. It was our first year trying to experiment with doing all our tomatoes from seed. Honestly, I think I'd rather buy them at the nursery, but alas, this way was much cheaper. Perhaps next year we will be a bit more experienced and have more success and less heart break. Of all the tomatoes we are growing this year, only one was purchased at the store. Who can resist a giant Roma for only $1.99!? It will soon take the German Lunchboxes place. 


In the backyard even more good news awaited me, my Rattlesnake Pole Beans are going crazy! They are now almost six feet tall and we had to add a new level of fencing for them to grow up. In addition to their beautiful purple flowers, they now have many healthy bunches of beans. I will pick some for my favorite green bean recipe, but most will be allowed to get bigger for shelling and eating fresh. It's always fun when experimenting with new plants go so well.

Tuesday, July 6, 2010

The Truth About Fruit Trees


When I was a kid, most of the places we lived had a few fruit trees in the yard. I remember in Indiana we had three apple trees, none of which ever seemed to do very well, but during the summer rains I loved to go out and pick apples. I'd hang a plastic bag from my wrist as I balanced precariously on the low crook of the tree, reaching for the green rain washed apples. They might not have tasted very good, but there was something about the rain that made them taste sweeter to me.

At my current home, I may not be able to pick apples in the rain anymore, but fruit trees have become an even bigger part of garden life. We inherited two wonderfully established green apple trees, a Mandarin orange tree and a lemon tree with our property. Since we've moved in we've also added an apricot tree and a pineapple guava tree to our front yard. I think we've about maxed out our tree potential, but I always have my eye open for a new spot I could wiggle in another one (perhaps an olive or fig).

Even though full size fruit trees offer many of the same benefits of non-fruiting trees, such as shade and beauty, there are a few things to consider before you plant one in your yard. The first is, what are you going to do with hundreds of peaches/apples/pears/etc. that suddenly become ripe in your backyard? Do you make preserves? Do you have family and friends that would like some? Along this last line, trading with family, friends and neighbors who have different fruit trees can be fun. There is nothing sadder than driving by a fruit tree with half it's fruit on the ground because it's owners really don't have a use for it or have forgotten it's even there. I had a friend a few years back who had an orange tree that was brimming with ripe fruit, when I asked her if I could have some for making marmalade she exclaimed, "Oh my gosh, I forgot we even had one. I just bought a bag of oranges at the store!"

The second thing to consider, is the mess a fruit tree makes. Even if you try your best to pick the fruit as it ripens, there will be some that ends up on the ground. If you are planting citrus or apples, this isn't such a big deal as their smell isn't bad and their decomposition is slow. If you are planting stone fruits such as peaches, apricots, plums, etc. you are in for a different mess entirely. They attract all kinds of bugs rather quickly, have a smell that tickles the nose in an unpleasant way and turn into mush quite fast. I might be being a bit dramatic about this but you should know what your in for and be prepared to regularly pick up fallen fruits.

The last thing I want to mention is dwarf vs. regular fruit trees. I have become a fan of either regular or semi-dwarf fruit trees over dwarf varieties lately. From my readings and personal experience, the dwarf varieties never seem to produce enough to make them truly worth the work. Semi-dwarf trees will still stay on the smallish side and you're getting more bang for your buck; and if you have room a properly trimmed full sized tree will give you even more. Of course if you just want enough to enjoy as a summertime snack here and there (or something that can go in a pot on your patio), dwarf is fine, but if you are looking to can produce for the winter, try to fit in a semi-dwarf or regular.

If you feel you are ready for the above mentioned things then you are ready to try a fruit tree. Just be sure to research the specific needs of the species of tree you're buy so that you are sure to get fruit and no just a sickly barren tree.

Tuesday, June 22, 2010

Soy Beans


It's been a bit delayed getting going, but our final raised bed is planted chuck full of soy beans! I've been waiting because the package said not to plant them until the temperatures consistently didn't fall below 50. With this unusually cold spring that meant I couldn't sew these seeds until the beginning of June! The only thing I didn't get to do with them that I had planned was to coat them in an inoculant first which helps them fix nitrogen to their roots. It's supposed to increase their yield, but the only nursery in my area that carries it is one I don't go to very often, so I eventually gave up on trying to get over there and just went without. I planted enough seeds though that I think we should be OK. In addition to freezing a lot to take as a snack to work, I'm sure we will be making this refreshing edamame salad as the grilling season heats up!


Edamame Salad

Ingredients:
Dressing
2 T Sesame oil
2 t soy sauce
1 T rice vinegar
½ t Asian chili garlic sauce

Salad
1 lbs. edamame
2 green onions thinly sliced
¼ c chopped mint
¼ c sliced almonds

1.) Cook edamame according to package directions (or simply thaw if already cooked) and place in the refrigerator until cool.

2.) Whisk together all dressing ingredients and set aside.

3.) Once edamame has cooled, combine the remaining salad ingredients and toss with the dressing. Serve chilled.


Monday, June 14, 2010

Ooops, I Did it Again


A few weeks ago I got excited when I experimented with onion flowers. I cut them and sprinkled them over a garden salad. It was delicious and tasty and I would highly recommend it if your onions flowers. I did a little research however, and found out that unlike garlic, onion flowers are a bad sign. I could paraphrase this, but I think a direct quote will work best.

"Flowering of onions can be caused by several things but usually the most prevalent is temperature fluctuation. An onion is classed as a biennial which means it normally takes 2 years to go from seed to seed. Temperature is the controlling or triggering factor in this process. If an onion plant is exposed to alternating cold and warm temperatures resulting in the onion plant going dormant, resuming growth, going dormant and then resuming growth again, the onion bulbs prematurely flower or bolt. The onion is deceived into believing it has completed two growth cycles or years of growth in its biennial life cycle so it finalizes the cycle by blooming."

Ok, so this doesn't sound so bad. You plan to pick your onion at the end of it's first year anyways. Then I read this.

"What can one do if flower stalks appear? Should the flower stalks be removed from the onion plants? Suit yourself but once the onion plant has bolted, or sent up a flower stalk, there is nothing you can do to eliminate this problem. The onion bulbs will be edible but smaller. Use these onions as soon as possible because the green flower stalk which emerges through the center of the bulb will make storage almost impossible."

Dangit. No more storage or hopes of giant onion bulbs for those plants. Well at least in my case the ones that flowered as a result of our warm then cold then warm again spring were few, and most of my crop is still on track to grow into big beautiful onions. So if yours happen to be in bloom, enjoy the flowers, and then enjoy some green onions!

Quotes were taken from here.

Thursday, June 10, 2010

Pickin' Stawberries

No friends, I still haven't gotten around to covering my strawberry plants, but today I did manage to find four berries that hadn't been attacked by birds yet! Luckily my plants are getting so bushy that they are starting to hide their tasty treats from the local wildlife. For some reason I always thought strawberry's would be hard to grow, but as long as they get plenty of water and sunshine they seem to do just fine. I think our exceptionally long spring also helped by giving them a long time to get established before the heat set in. Take a look at these beauties.

While I was good and saved half the berries for my poor sick Jeffry, who was still in bed while I was foraging in my pj's in the front yard, I was able to enjoy one of my favorite weekday breakfasts. I really should buy a coaster for my desk.... 


Tuesday, June 8, 2010

Invasive Plants


My response to this picture should be one of great joy. I bought this bush months ago for a great price at OSH (in fact I bought two). I knew exactly where I'd plant them, all I needed to do was build a couple small planter boxes. No problem right? Well if you're me projects are easy to think up and hard to get around to. Months later I'd repeatedly forgotten to water them and they were looking rather pathetic and snail bitten out on my front patio. By the time I put them in the ground they were half dead, but I still had hope. A week later maybe a quarter of the plant was left alive. I decided it was time to take serious measures. I chopped back both the plants to just their core and fertilized them heavily. MONTHS later, they are green and even starting to bloom again. I should be over joyed.

Why am I not you might ask? Well, look carefully at the center of this picture. That green stalk that is growing is NOT part of my bush. That my friends, is horsetail reed. This is yet another one of the plants I inherited from my home's previous owner and in case you haven't guessed it, its invasive. The bed of horsetail reed is about eight feet away from this bed, yet low and behold, it's found its way over to my bushes.

If you see horsetail reed and are considering buying it, don't let this post completely discourage you. It has a wonderful history of being used for scrubbing pots and such. If you're a pioneer it could be quite useful. It also looks quite lovely cut at different levels in a vase, and makes a delightful popping sound when you pull apart its sections. I will strongly caution you however, to put it in a pot. This is a good lesson for any invasive plants you might have your eye on, and this is not just limited to ornamentals. Plants such as mint and horse radish are a pain to get rid of once they find a home they like. Just a thought.

Wednesday, June 2, 2010

Some Stoop Shots

This past weekend Jeffry and I checked out the San Fransisco Botanical Garden with some friends. While I forgot to take pictures of the many different garden styles the garden displays, I was pretty shocked by the number of plants I recognized from my own yard! On the hike back to our car I started to take notice of some very pretty or interesting planter options that we passed and snapped a few photos to share with you.


Alright, I know it's hard to see in this picture, but on the bottom left balcony they turned a cinder block wall into homes for plants. They stacked the cinder blocks so the holes were facing up, and then placed plane pots (like the type you get the plants in from the nursery) in those holes. Since the ends are like steps, it made a lot of different heights for the plants to sit. I imagine you could also do something with placing boards between the layers of blocks. That way you could plant directly in the holes. Its a great mix of industrial and organic.


I liked this one because it looks like a little cottage stoop. Like if your turned around you wouldn't see a row of houses, but your favorite vacation spot. Unlike some urban  porches and balconies, which seem to try and fit a whole forest worth of plants into a teeny tiny space, these porches  look like the owners just invited a few of their favorite friends over to brighten up the space.


This last planter design I enjoyed because of it's clean lines and structure. So much in SF seems to look a little worn around the edges and unstructured, but this planter stands firm with sharp corners and tidy containers to keep the chaos inside them in order. I imagine it also provides a nice place to sit on a sunny day.

Tuesday, May 25, 2010

Morbid Plants

I have been developing a fascination for plants with morbid names. You might have noticed it starting when I blogged about Burning Hearts a few months ago. A patch of Bleeding Hearts, check. A pot full of Burning Hearts, check. So what shall be next on my morbid plant list you ask? Well, I have already purchased seeds for a little beauty called Love Lies Bleeding. Oh yes. It will be mine. Not only does it have a fabulous name, but just look at this amazing plant.


Love Lies Bleeding comes from more humid regions of the Americas, and is also apparently edible. It can be adapted, however, to grow in more arid climates. The plant can grow into a small bush, up to 4 feet tall. The cascading flowers can grow as long as 18 inches.

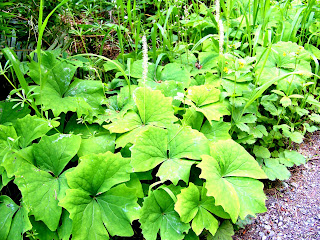
Another beauty I discovered today is a ground cover called Sweet After Death. Its name comes from the fact that while the plant has no scent while alive, its leaves smell like vanilla once they've dried. This would be a welcomed whiff as you walk down your garden paths in the fall. It does also flower, sending up white spires high above it's broad leaves.


I'm not sure how well this plant would thrive at my house. It is quite prevalent in the Pacific Northwest, which has a somewhat similar climate to the bay area. Perhaps I could sneak it in to a dark corner of the yard.

I think a rather tragic storyline could play itself out in my yard. Imagine if you will, walking down the side walk next to my house, first you pass some bachelors buttons, then a patch of (insert some sort of innocent female named flower, I'm sure it's out there), a few Burning Hearts (ah, young love), then Forget Me Nots (gasp, the lovers have parted), then Love Lies Bleeding (could no longer take the separation) and finally Sweet After Death. Very Romeo and Juliet I must say.


Monday, May 24, 2010

Testing Pea # 212,000

As I have lamented on this blog before, peas don't like to grow for me. I believe in all my attempts to grow them I have eaten two pods over the last two or three years. This year I already tried one batch of peas. They were all eaten by my other nemesis, senor snail.


I was not to be discouraged however, and for the first time in my pea attempts, planted a second crop. I put them in a shadier spot with worse soil and they are doing fantastic! I do fear that when I go home tonight they will all be dead (perhaps as I type this little snails are gnawing away at the leaves), but as of this morning they were all several feet high and one had even set a couple pods. I think this is the year my friends. Yes, this is the year.


Friday, May 21, 2010

Rattlesnake Beans

One new plant I'm trying to grow this year is beans. Jeffry doesn't eat green beans so they will be mostly for drying and using in stews over the winter. This will be a nice way to extend the harvest as we'll eat fresh stuff out of the garden during the summer, and have the dried beans to munch on during the fall and winter months.

I had hoped to get them in the ground sooner, but our unusually cool spring has forced me to hold off on many of my garden plans. Not only are daytime temperatures not getting above the mid 70's, but about a week and a half ago it was in the 30's when I woke up. That wonderful ocean breeze that I love so much in the heat of summer is also not helping. It blows in at about 5 o'clock and quickly rids the air of any warmth it had managed to accumulate during the day. I finally couldn't wait any longer however, and so far these little seedlings seem to be doing OK.


I've chosen to grow rattlesnake beans, which I purchased several months back from Baker Creek Seed Co. You might be wondering why I picked this bean over all others, the honest truth is unfortunately not filled with wisdom and research. I though they looked pretty, and the back of the Baker Creek seed package raved about how wonderful they are. Their pods are green with purple stripes running through them, and the seeds themselves are cream colored with reddish brown streaks running through them. Their colors just sounded like a work of art to me. The vines also grow to be 10 feet tall with 7 inch pods! That's gigantic, and another reason I wanted them. I can't wait to until later this summer when these colorful bean vines will dwarf me!

Anyone else excited about trying something new?

Wednesday, May 19, 2010

Where Have I Been?

It always seems like I stumble upon new blogs when the writer has just returned from a long absence. I have thus read a lot of posts with titles like, "Where I've Been" or "What I've Been Up To" and they usually contain some sort of apology for not writing more and a dash of self importance as they tell their readers not to fear, for they have been off doing exciting things but they appreciate the concern. As I was new to these blogs I hadn't been worried for their safety or pondering why on earth they hadn't written a new post in a week or more, but none the less I read their post describing their generally exciting exploits and by the time they were finished I was also happy that they were back so that I could look forward to future posts. Well, it's my turn.

I know you all have probably been wondering where on earth I have been. Was I in a car accident? Did I suffer amnesia and was waiting alone in a hospital room  for someone to come claim me and tell me my true identity? Did I suffer a stroke in the back yard and was currently becoming the main course for my chickens who were now starving because I hadn't been feeding them because well, I was dead? Did the snails finally fight back and decide it was time to launch an offensive? Did I finally go crazy pulling weeds and run off to the dessert to escape the daily chores required just to try and keep up with my yard? No dear friends, this is not it at all. In fact, wait for it....I've been up to some rather exciting things.

First, I went away for Mother's Day weekend with the best of mothers. We stayed in cabins and ate at East West Cafe in Sebastapol (highly recommend stopping their for lunch if you're ever in the area). It was on that trip that I saw my first Banana Slug ever in the Armstrong Redwoods. He looks like he's about ready for bread making.


Later that week I was taken out to Chez Pannise for the first time. The food was amazing with a main course of lamb. The first course however, involved anchovies. I did not like them. I figure if Chez Pannise can't make them tasty  then I will never learn to like them. Oh and  while I was there, this happened:


Since then (in the past 7 days) we have booked the church, set a bridal shower date, set up consultations with two wedding dress shops, picked our wedding favors and purchased our wedding rings. Oh, I also had a 50's themed birthday BBQ at my house on Saturday. I made my own dress.


So as you can see dear friends. You had no reason to fear, other than for the fact that you missed my witty and informative posts. Those shall now resume again, so grab a glass of cool iced tea and read along.

Tuesday, May 18, 2010

Robin's Birthday Mac & Cheese

With Robin having a 50’s theme for her birthday, I thought back to my childhood days in the 50’s (OK a couple were in the 40’s) and remembered one of my favorite foods was macaroni and cheese. Of course, that was the “chedder only” version because, in the Midwest where I grew up, you didn’t ever do anything unusual or unique with food…mac and cheese was mandated by social law to be made from chedder cheese only.


When Robin and I were last in Disneyland we had some 4 cheese mac and cheese that was fantastic so I got on the internet and searched 4 cheese mac and cheese and came up with a very simple recipe that sounded like it was similar to the Disneyland version. I brought the ingredients to Robin’s and made it there. It went into the oven a soupy mess that I thought looked inedible but cooked up fine, and all the comments I got on it were great. It is not the creamy type that comes out of the Kraft box but more like the macaroni was coated with a very thick layer of dry cheese. Very unusual but very good. So if anyone wants to try it, here is the recipe as I made it.

Cook macaroni until just tender (I put the macaroni in the water before heating and timed it for 8 minutes after it began boiling). You definitely don’t want it mushy. Drain and set aside.

Heat 4 cups of cream (I used 2 cups of heavy whipping cream and 2 cups half and half because that is what I had) to scalding, remove from heat and stir in 4 ounces each of shredded chedder, jack, guyere and asiago cheese and mix until smooth. Mix with macaroni in an appropriate overproof casserole dish, top with bread crumbs and a small amount of grated parmesean. You can also add some Cajun seasoning to the bread crumbs…I added ½ teaspoon but would suggest more as the flavor was extremely mild…maybe 1 ½ to 2 teaspoons.

Bake at 375 for about 15 minutes or until top is browned. I let it sit for about 10 minutes before serving to let it set up some.

What little left overs I had went great with some ham and homemade applesauce the next day.

Friday, May 7, 2010

Tough Enough for a Man, but Specifically Designed For...

Happy Friday everyone! I just have to share with you this silly but adorable tool set that I saw at Wal-mart last night. Women of the world rejoice, you can now be handy without sacrificing your femininity! All it takes is dyeing the handles of your tools to create this magical transformation from sweaty man work to lady like industriousness*. Honestly though, as much as a pink tool set seems silly, the kit does include some good basics if you have the need. I believe there was also one in blue if you'd like a his and hers set. If you have an aversion to shopping at Wal-mart, you can also pick it up from amazon here.


*string of pearls and high heels not included.

Thursday, May 6, 2010

Lemon Garlic Dip

Last night Mr. Jeffry and I got to enjoy our first real harvest dish, home grown artichokes. In addition to our artichokes, we grilled chicken legs and sweet corn on the cob. Considering the fact that we don't have corn holders, it was a rather messy finger lickin' meal, but going animal style every once in a while has its appeal.

I've never really been satisfied with dipping my artichokes in butter or mayo, I always feel like something was missing, like it could be better than it was. So last night I tried a little experiment. I chopped up about a tablespoon of preserved lemon and added it, along with a 1/4 tsp. of garlic powder, to about 4 Tbsp. of mayo.

I mixed it up about an hour before we ate so it would have time to steep and let me tell you, I was not disappointed. Jeffry didn't seem to be quite as excited about it as me, but he was satisfied by the original butter/mayo options, so for him it was not a moment of long awaited fulfillment. We had some dip left over so I used it like regular mayo on the deli sandwich I was making for lunch. Once again, very pleased.

Wednesday, May 5, 2010

Green Strawberry Love

They're Heeeeeere! Yes my friends the time has come, soon I will taste the sweet summery goodness of strawberries grown with our own four hands. They've been weeded, they've been fertilized and they've been watered, and now they are sending out runners (surprising considering this breed was suppose to not send many out) and setting what looks to me like some seriously tasty fruit. This guy even has some red starting to show!

It won't be long now until I have to find ways to use these guys up (I know, poor me!). I imagine many will simply be eaten as is, perhaps still wet from the sprinkler and warm from the sun, but I'd love to hear any recipes you may have. Dipped in chocolate? Strawberry shortcake? Preserves?

Thursday, April 29, 2010

Hen and Chicks

Our baby chicks are starting to look like sturdy tweeners and with the beautiful sunshine we had earlier this week we decided it was time to introduce them to the rest of the flock. This visitation was of course highly supervised, and if the chicks really needed to escape an angry hen we quickly learned the chicken run was not capable of containing them. I had read a few really terrible stories recently about chicks getting pecked to death by older hens so I must admit I feared a little bit for our crazy baby leghorns.

All my fears were for naught however, as once again we were blessed by the quiet gentle personalities of our Buff Orpingtons. I must say, the chicks seemed a lot more comfortable moving around the hens then they are around Jeff and I. They quickly integrated themselves into the group and enjoyed their first chance to really run around freely in the great outdoors.


(Yeah its a terrible pic, but getting them to hold still for a photo is like asking the sasquatch to pose.)

While they busied themselves chasing bugs and Jeffry cleaned out their cage, I sprinkled lots of baking soda around the spot their cage had been in the extension and let that deodorize for a bit. Honestly, I didn't think the smell was really all that strong, but I also think I might have just gotten used to it over the last month that they have been our housemates, so I didn't want to take any chances. I will also be seeing if I can borrow a carpet cleaner in the next week or so just to be safe. The chicks are now securely settled in to their transitional home in the garden shed, until they are big enough to be contained in the regular chicken run.

Wednesday, April 28, 2010

Return It Better Than You Found It

Over the last year, I have dug gardens in areas of new construction and old established neighborhoods. In both these places I have learned and relearned an important lesson, burying something doesn’t make it disappear. It’s still there, and thirty years later those cement chunks that you intentionally buried five inches below the surface (grr) or those pesky plant labels that blew away in the wind will still be there to bother some other gardener.
I have found all sorts of things in the ground in which I planned to grow my food. The afore mentioned cement chunks and plastic plant tags have presented themselves in great abundance, but I have also found bottle caps, sardine cans, random chunks of plastic and packaging, a horseshoe and my most recent favorite, an old rusty razor blade (good thing I wear gloves). While finding these things buried in my yard has given rise to more than a little frustration inside this otherwise mild mannered gardener, they have also served as a great reminder to me of another lesson I have learned, the ground I’m working isn’t really mine.

In saying this, I’m not trying to espouse some political view on land ownership but simply stating the truth that this land will not be mine forever. Eventually, someday, I will be gone and someone else will take up stewardship of my little plot, and when that happens they will inherit everything I have ever done here. Any short cuts I ever made on house repairs or other building projects will be theirs. Any time I tried to save a few bucks by not disposing of waste properly will be theirs. Or any time I was careless and didn’t make sure all the bits of garbage where picked up when I was done with a project, those will also be theirs.

I find the idea that I am passing on something, instead of just creating a little oasis for myself, adds a new level of thought to my gardening. It motivates me not only to be more careful with my own behavior, but to make sure I take the time to clean up the carelessness of previous owners. As I reset boards in the garden, lay pavers or dig holes for new plants (cleaning up the soil as I go), I like to think about how someday another young gardener will be digging in that same dirt, and her work will be a little easier because I passed on the land a little better than I found it.


What has gardening taught you?

Wednesday, April 21, 2010

Flowers and Foothills Part II

Welcome back to part two of a day trip to the foothills. After we had stuffed ourselves silly with pizza, tested our trivia on things such as history, Knight Rider, and science and hit a few thrift stores we headed toward the town of Grass Valley and our second nursery stop.


Prospector’s Nursery is definitely a different experience from Bald Mountain. Yes, you’ll spend more on plants there than at Bald Mountain, but you will also be able to purchase harder to find ornamentals such as Burning Hearts (they do not carry edibles except for a few fruit trees). In addition to having rarer plants, they also just have a wider variety of non-tree plants than you will find at Bald Mountain. I do think Bald Mountain has them beat when it comes to tree varieties, but its close.


Out front you’ll find all their sun loving plants (I recommend bringing a good pair of sunglasses), but when you head out back you are suddenly surrounded by pine trees and can slowly meander through their shade loving plants. If you have a shady nook that you are having trouble finding the right plants for, look no further. Their selection of shade adoring ornamentals is impressive.


Another major difference between the two nurseries is that Prospector’s has a large indoor area of home and garden stuff. They carry all sorts of cute décor items (often with a garden theme), table cloths, serving wear, plant tags, lotions, cute garden tools, candles, etc. Generally I find some little reasonably priced thing that I never new I needed so badly. Inside they also always have complementary cookies with either hot or iced tea depending on the season.


Lastly, although Prospector’s Nursery is more upscale than Bald Mountain (and therefore charges accordingly) they are NOT snooty. In fact, I have always found their staff to be one of the most pleasant parts of their establishment. They are energetic, sincere and interested in the projects you have planned with the plants you are purchasing and are happy to offer advice and encouragement. I think the differences between the two nurseries make them a perfect match to visit in the same day. Visit Bald Mountain for a slow relaxing country stroll and to get your Johnny Jump Ups, Petunias, fruits trees, etc. and then take the beautiful drive up to Prospector and enjoy the more exotic varieties, the indoor goodies and of course, cookies!

When the trunk is full it's time to head home!

Mom and I had to get back to Sacramento after Prospectors, but if you have a little more time you should take a stroll through Nevada City or Grass Valley. There is a nice old theatre in downtown Grass Valley called the Del Oro where you could catch a movie and there are plenty of places in that area to grab some dinner. The two main streets in downtown Grass Valley are also far more level than the hill that is Nevada City.

*Pictures from the lense of K.E. Fisher

Tuesday, April 20, 2010

Flowers and Foothills

Last weekend my mother and I decided to take a Saturday to get out and enjoy some sunshine and flowers while Jeff enjoyed a cold one and a baseball game. We turned it into a day trip up to the foothills and visited a couple of nurseries that my mom has been quite fond of. If you are into flowers and a pretty drive I recommend you do the same sometime in the next month before everything turns brown. If you have kids, there is even a huge park complete with a swimming hole, playgrounds and Frisbee golf course to let them burn off some steam. Today I’ll share the first half of the trip with you.


If you go up highway 99 for a long time and then make a few lefts and a right you will find yourself on a narrow road near the town of Brown’s Valley. You may think this is just some dead end country road with nothing of interest, but you’d only be half right. Less than a mile off the main road is Bald Mountain Nursery, a family run establishment that makes you feel like you are just wandering around a friend’s front yard. You’ll find cozy benches nestled under shade trees should you need to take a break from browsing and friendly doggies running around keeping an eye on things.


While this location definitely focuses more on ornamental plants, it still has a very good selection of fruit trees and a few tables of basic vegetables. If you are looking for a specific kind of fig, they probably have six or seven different varieties, all at a very reasonable price.


This nursery also has a very strong focus on the plants themselves, not garden decoration. You will find no statuary or little miscellaneous garden bobbles for sale. About the only thing you’ll find in the actual store is a cash register, fertilizer and ice cold bottled water for 50 cents. When you’re ready to check out, just leave your cart outside and get an employee to come ring you up by hand. Of course, there might be a security inspection first.


After you leave Bald Mountain you should head to the equally small town of Penn Valley for the previously mentioned park, some of the world’s best pizza at Northridge Restaurant (complete with a trivia booklet at each table) and a little thrift store browsing. Personally I think the better of the two thrift stores is the Penn Valley Fire Dept Auxiliary Thrift Shop‎ located behind the fire station next to the rodeo ring. The Hospice Gift and Thrift next to the pizza place is way more expensive.

*pictures from the lense of K.E. Fisher

Monday, April 19, 2010

BBQ

I just have to share something with you all. Until last night I had never started a fire in a charcoal grill. Until recently I was usually just grilling for one and found gas grills too convenient to give up. Last night however, Jeffry was coming home late from work so I decided that gosh darnet I could start our Webber all by myself, and I did. It was way easier than I expected and I didn't even get that smoky. The smoke is another reason I didn't like cooking with charcoal. I can't stand the smell saturating my clothes and more importantly my hair. Its not a girly thing, the smell is just REALLY unpleasant to me. That's not to say I don't enjoy catching a whiff of a passing BBQ, but I don't like the smell of it absorbed into my hair where I can't get away from it.


I think what made it so easy to start was that I used brown paper grocery bags to light the coals. They seem to burn a little slower than newspaper so they really got the coals going before the paper was all burnt up. I've seen friends and family trying to get their charcoal going and they have to add more newspaper and mess with it a lot which results in a waste of time and even more of the afore mentioned smoke saturation. I simply tore up 1 1/2 brown paper bags, crumpled the pieces into little balls and shoved the bottom of the chimney full of them. I only had to light it once and then stand back a good distance from the smoke and watch the coals take light. If you can't tell, I was quite proud!

Friday, April 16, 2010

Life Cycle of Snails and Other Stuff

As I am sure I have mentioned on multiple occasions, I have been trying for several years to grow peas. In that time, however, I have never enjoyed a meal that involved peas from my garden. In fact, I have only been able to eat two pea pods in that entire time. Perhaps I am crazy for doing the same thing over and over again expecting a different result, but this year I have already planted a crop of peas. They all died. Unwilling to give up, last night I planted a second crop of even stronger looking peas. I only turned my back for a moment and....


Oh hell no. This is what happens when you mess with my peas.


Enjoy your fate senor snail.


I have however, become more interested in snail life since I discovered how much my chickens love eating them, and I'm pretty sure my neighbors think I'm psycho running around the yard in my pj's with a bucket hunting for them. Here are some fun facts I've learned.

1) Snails do not reach sexual maturity until they are about two years old. You will know they are mature because the opening of their shell will have a lip on it signifying it has stopped growing.
2) All snails have both male and female reproductive organs so when they mate, both become pregnant with about 100 eggs.
3) Snails mate once a month, and then the eggs take another month to hatch.
4) A snail can live anywhere from 5-15 years depending on the species.
5) Snails are deaf and almost blind.
6) Snails will hibernate during inclement weather by pulling into their shells and sealing the opening with either a chalky substance or mucus. They leave a small hole to allow air in.

If you say to yourself, "I NEED MORE SNAIL INFO!!!" Well then you’re probably a wierdo, but since I don't judge you for that, here are more sites you can check out:

http://animals.about.com/od/mollusks/ig/World-of-Snails/Snail-3.htm
-has great pictures and general details

http://animals.about.com/gi/o.htmzi=1/XJ&zTi=1&sdn=animals&cdn=education&tm=4&gps=213_680_1004_612&f=20&tt=33&bt=0&bts=0&st=23&zu=http://www.arnobrosi.com/snails/snail.html
-Everything you ever wanted to know about snails, and probably a little bit you didn’t.

http://www.petsnails.co.uk/care/breeding.html
-snail breeding, kinda gross.