Showing posts with label food preservation. Show all posts

Friday, April 6, 2012

Drunken Apricot Spread

I have been canning for quite a while now, and although its a hobby I really enjoy, it has also lead me to can things I'm just not going to eat. For instance, I don't really eat jam, but when I come across a ton of fruit that is either free or very cheap, I have a hard time not turning it into jam. Thus I tend to have jars of it lingering in my fridge for far to long with only one scoop taken out. Understandably I get pretty excited when I come across a recipe for my overabundance of the sweet stuff.

This recipe is great because it cuts the crazy sweetness of the jam so it doesn't overpower my savory inclinations at breakfast time. It also has booze it in, and who doesn't love having an excuse to pull out their jug of bourbon at 7:00 in the morning? I did accidentally pour too much bourbon into my measuring spoon. My automatic reaction was to drink the extra (like licking the spoon when baking a cake). Luckily I remembered that this was booze and it was only 8:00 am before I drank it. Back into the bottle went the extra. I swear.

 The original recipe called for peach preserves, but I think any stone fruit would pair fine with the spiciness of the bourbon. I happened to have apricot so that's what I used. The original also called for 1/4 of preserves. While that ratio looks prettier, I wanted the apricot flavor to come through a little stronger.

Drunken Apricot Spread
original recipe can be found here

1/2 cup of room temperature salted butter
1/4-1/2 a cup of apricot preserves
1 1/2 Tbsp. of bourbon
1 Tbsp. lemon zest

Directions
1) Cream the butter with a hand held mixer.
2) Add remaining ingredients and mix well.
3) Spread a nice thick layer on a grainy piece of toast and enjoy.

Friday, February 25, 2011

Lemon Curd

In the continuing what can I do with all these lemons saga, I decided to try my hand at some lemon curd. I had read a blog a while back about making curds and had filed it away under the someday category of my brain but I had honestly forgotten about it as I stared at my pile of lemons over the last couple of weeks. I had been waiting for them to speak to me, like a sculptor staring at a blank rock waiting for it to tell him what it's meant to be. Then, a week ago I had a baking day with some friends, one of whom brought a jar of lemon curd her mother had made. Suddenly that filed away blog post came running back into my mind and I felt silly for not having remembered it earlier. A brief Internet search later I marched into my kitchen with a recipe in one hand and a basket of lemons in the other, ready to create that beautiful mixture of sunshine and happiness that is lemon curd.

Before I launch into the recipe, I know some of you may still be stuck thinking, lemon what? Lemon curd, which is sometimes also referred to as lemon cheese, became popular in England and America in the 1800s as an accompaniment to toast, scones, muffins, etc. during afternoon tea. It can also be used as a filling for cakes and tarts. The most popular form in which you are most likely to have encountered it is in lemon meringue pie, the bottom half of which is lemon curd. Lemon curd is similar to lemon custard, but curds contain more juice and zest than custards, which makes their flavor more intense. Oh and just in case you aren't particularly fond of lemon, curds can be made with any citrus and even other fruits such as blueberries and raspberries!

Lemon Curd aka Sunshine on a Spoon
recipe from Fine Cooking

Ingredients

6 Tbsp. soft unsalted butter
1 cup of sugar
2 whole eggs
2 egg yolks
2/3 cup of lemon juice
1 tsp. lemon zest

Directions

1) In a large bowl beat the sugar and butter together with an electric mixer for about 2 minutes.

2) Slowly add the eggs and yolks. Fully incorporate each egg/yolk before adding the next one.


3) Beat mixture for 1 minute then add the lemon juice. Be sure to strain the lemon juice  to get all the bits of  pulp out so your curd comes out smooth. Cheese cloth works great for that.


4) Heat the mixture in a non-reactive pan over medium heat for about 15 minutes stirring gently but constantly. Do not let the mixture boil. The curd is done when it reaches 170 degrees or when it has thickened significantly and your finger leaves a path through it on the back of a spoon.


5) Remove curd from heat and add zest. Allow to cool slightly then transfer to a bowl and cover with plastic wrap so that the wrap is touching the curd. This will prevent a skin from forming on top of the curd as it cools. Refrigerate overnight and then transfer to permanent lidded containers such as canning jars.

*Notes
-When you first add the lemon juice the mixture may curdle a bit, don't worry, it'll all melt together.

-The curd is very hot at 170 degrees. Be prepared for it to hurt your finger if you use the spoon test.
-This batch should make roughly two cups of curd (total estimate, I didn't measure).
- Curd will keep in the fridge for a couple weeks, or you can freeze it and use it over the next six months or so.
-Be careful when heating your curd that you don't overcook it. It quickly goes from being about 150 to being 170. I got surprised by that and ended up cooking mine up to about 180. It tastes fine, just not quite as awesome as it would have.


Thursday, February 24, 2011

Lemon Pickles

There is a blog I very much enjoy reading called Tigress in a Pickle. While I rarely get to pickle things because I live with a pickled food hater (and pickling for one seems like a lot of work), I still enjoy reading her always interesting recipes and partaking of her brief but witty posts. She does a lot with Indian flavors which I find rather interesting, and when she posted about Indian sun pickles I just had to give them a try.

You see, I have a plethora of lemons from my lemon tree/bush right now and have been at a loss for what to do with them. One can only drink so much lemon aide and I already have a batch of limoncello steeping! If you do not find yourself in my position, I'm pretty sure you probably have a neighbor who is and would love to unload some produce on you. If, however, you're neighbor is a stingy mean old man who would rather see his lemons rot on the ground than give a few to you, just remember, the cover of darkness is your friend.

These sun pickles also don't really resemble what westerners would consider to be a pickle, so I think Jeffry will find them tasty. Sun pickles are like preserved lemons, but with more interesting flavors than salt and cinnamon. The lemon juice and good old fashion sunshine are what pickles the lemons, so no vinegar taste here. I'm not entirely sure what I will do with these once they are done, but the Tigress recommends chopping them up and mixing them with some basmanti rice and a dollop of yogurt on the side. I figure I'll start there and then begin experimenting. Perhaps some mixed in with fresh steamed cauliflower? I halved her original recipe to be more realistic with my uses. Whether one is canning, gardening or crafting it's always important to keep your production in line with reasonable use (are you really going to use 30 handmade doilies?). No point in storing two liters of pickled lemons in your fridge if you're not sure you're even going to like them. If you do end up loving them, you can always make more!

Sweet n' Spicy Lemon Pickle
from tigress in a pickle

Ingredients

8 small very fresh lemons, no blemishes

2 small lemons, juiced
1 Tbsp. cayenne powder
1 cup lightly packed brown sugar
1.5 Tbsp. sea salt
.75  Tbsp. whole fennel seeds
.75  Tbsp. whole cumin seeds
.5 Tsp. whole fenugreek seeds
.75  Tbsp. whole peppercorns
1 liter jar with a tight fitting non-reactive (no metal) lid
(I got my jar at cost plus, but I imagine ikea carries some good options too)

Directions

1) Wash your lemons and scrub any dirt off them. Make sure they are completely dry before moving to step two. Any water or yuck on your lemons could add to the risk of the batch going bad as it pickles.

2) Roast the fennel, cumin and fenugreek seeds in a dry pan over medium heat for a few minutes until they turn a shade darker and start to give off a toasty aromatic smell. Careful not to burn them. Once toasted, remove from the pan and grind the toasted seeds along with the salt and peppercorns. You can do this with a spice grinder or a mortar and pestle. This is a good task for your spouse/helpful friend while you do work on #3.


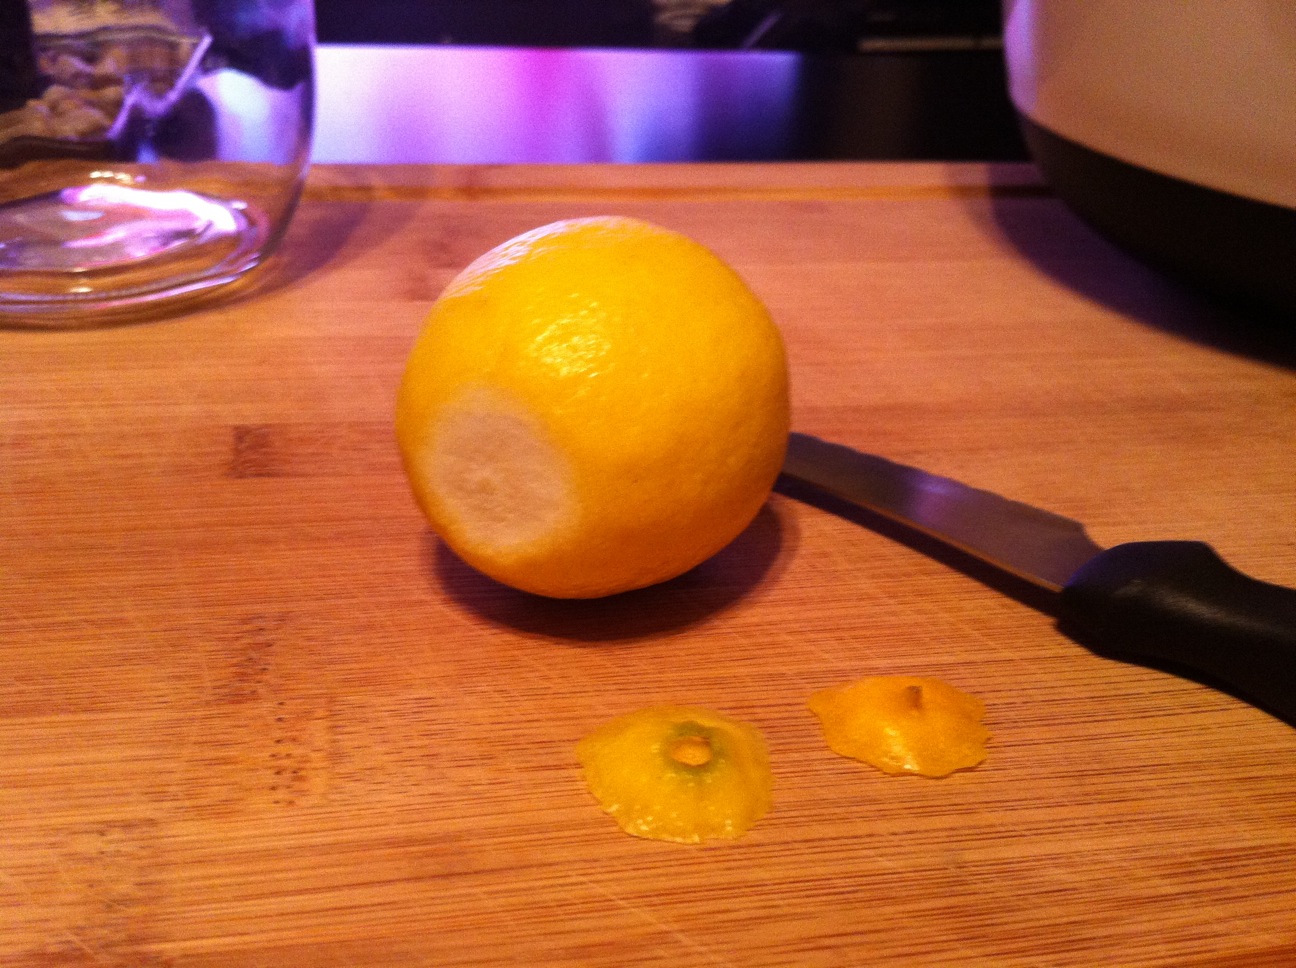
3) Cut off the two bump or scar ends on the lemons. Then cut them into medium sized chunks. I quartered mine, then sliced each quarter into two or three pieces. Remove any big seeds you find.

4) Mix your ground spices with the brown sugar and cayenne pepper.


5) Fill your very clean, very dry jar half way with lemons. These will shrink a lot over the next few days so don't be afraid to really pack them in there. Pour half the spice mixture over them and fill the jar the rest of the way with lemons. If your jar isn't full, you can always add more lemons than the recipe calls for. Top with the remaining spice mixture and the juice from two lemons.

6) Close the lid and shake vigorously!

7) Place jar in a sunny window for 8 weeks and shake once a day to distribute the spices. After the 8 weeks you can place the jar in the fridge where it should keep for a year.


*Notes
-Fenugreek is an indian spice and I highly recommend buying from a food co op. A whole jar of spices from the bulk bin at a co op costs about 50 cents. Refilling your spice jars from the bulk bins will save you a TON of monies.

-You can check the mixture at 7 weeks to check for doneness. If the liquid has thickened and the skins are soft they are done and can be put in the fridge.


Wednesday, October 28, 2009

Tying Up The Loose Ends

Its that bittersweet time of year my friends when the last of the summer garden is still trying to produce one last fruit. I have a hard time pulling up my tomato bushes. I want to wait until they are 100% dead, but that means I wait a long time for them to stop giving me one tomato here and there. Truly, I am hoping that yesterdays windstorm knocked a few of them down so I'll know that I have to pull them up.


My mom, however, does not feel this same guilt at tearing her still green tomato plants out of the soil in preparation for winter. All of her plants are already in the green waste bin and her last bit a food preservation finished for the winter. Enjoy her guest post.
THE LAST OF THE TOMATOES

For the last month my tomato production has been slowing drastically. No longer was I picking enough to can in one day. So as to not waste the ones that were more than I would eat fresh, every week I would take those that were fully ripe, peel them and cut them up over a strainer. The juice that came off was very thin but delicious and I put that in the refrigerator to drink fresh. The rest I put in baggies and froze. Today I pulled up the rest of my tomato plants so the frozen pieces that I had been saving for the last month were ready to can. I thawed them out, ran them through the juicer with some carrots, onions and garlic, boiled up the concoction and canned it. It is the consistency of V8 juice but has no salt or things I can’t pronounce in it. Ad a dash of hot sauce and it makes the most delicious Bloody Marys. I ended up with 11 pints canned and a quart in the refrigerator to use in the next few days. Thus ends my 2009 tomato canning. I now have stewed tomatoes for winter chili, homemade tomato soup to go with the toasted cheese sandwiches, salsa for my tacos and juice for my bloody marys. It’s going to be a good winter.

Sunday, September 6, 2009

Kay's Tomato Basil Soup


Here is my first guest blog for your enjoyment. Hope you enjoy my Mother's post!


Home Canned Tomato Soup


Back in the good old days when Robin and her brother were little and we lived in Grass Valley, we used to go up I 80 to Emmigrant Gap in the winter and play in the snow. After getting cold, wet and worn out we would trek on up to the Rainbow Lodge for some steaming soup. I think the best I ever had there was their Tomato Basil. Normally I’m not a fan of pureed soups but this one was spectacular. Since I have an overabundance of tomatoes this year (after 2 years of limited success) and I have already canned all of the salsa and chili base I can use, I was looking for something else to make. I’m not much of a pasta eater so ruled out the marinara sauce and decided to try some homemade tomato soup. My first batch was to “tomato-y” since I made it pretty much like I canned my chili and soup base with tomatoes, celery, peppers and onions. The next batch I really liked so here is my experiment.

1) Peel a bunch of tomatoes and cut them into pieces into a regular strainer so the juice will go into a bowl (fresh tomato juice is one of the delightful byproducts of the soup).
You will need 15 cups of tomato pulp to make 8 pints of soup. Depending on the type of tomatoes you use, this should give you over 2 quarts of pure tomato juice for your enjoyment.

2)Dump the tomato pulp into a large pan (dutch oven works great) and add 1 medium onion cut into chunks, one large head of garlic, 15 small peeled carrots (the kind you get in a bag) and either a cup of fresh basil or 2 tablespoons dried basil leaves (I used the dry because I stripped my basil for my first try).


A note on the garlic…..since the French use lots of garlic and don’t peel it, I didn’t peel mine either…just popped them into cloves and cut off the root end. They don’t even need to be cut up (neither do the carrots) because you are going to liquefy them in the blender.


3)Boil everything together until the carrots are soft (about 45 minutes) stirring occasionally. Let cool a bit and then liquefy it all in the blender in batches.

4)Now comes the fun part. The conical looking steel contraption you see in the picture is an old fashioned food strainer. It is great for juicing or making fruit butters. You just sit the strainer in a large pan, pour the liquefied mass into it and run the wooden masher around and around until all you have left is the dried pulp which you throw on the compost pile. I got mine 6 or 7 years ago at Emigh Hardware.


5)When you have the thick liquid all strained, bring it back to a boil, put into jars and water bath for 10 minutes for pints (15 if you make lots in quarts). This is also a good time to taste and add any additional spices you might like. I don’t add salt to my cooking as I have gotten used to using herbs for flavoring and prefer it.


6)To serve just add some cream or milk to taste and heat. Goes absolutely great with a toasted cheese sandwich.


After you have cleaned up, sit back and enjoy a big glass of fresh tomato juice (additional ingredients are up to you) and think about how good that Tomato Basil soup is going to taste on a cold rainy day this winter, and how good you feel knowing that you can pronounce every ingredient in it.
-Kay

Friday, August 28, 2009

Simply Delicious Marinara Sauce


Last night I promised my biggest fan, hi mom, that I would post this recipe for her. I never write down my experiments as I do them, so I woke up early this morning to make myself some marinara sauce so & write a recipe for her. This recipe is so easy, you can do most of it before your first cup of coffee!


Simply Delicious Marinara Sauce

Ingredients:

25 medium tomatoes
10 cloves of garlic
1 large onion
1/2 a cup of fresh basil leaves
butter


1) Start a large pot of water on high heat. This will be used to peel your tomatoes.

2) Roughly chop onion and garlic and brown in a big dollop of butter (use a large pot not a pan). Add the onion first, allowing it to soften and then add the garlic. You don't have to chop if fine because it will go in the blender later.

3) While the onion and garlic finish browning, start adding the tomatoes in batches to the boiling water you started in step one. Leave them in the pot for about 30 seconds, then remove and submerge in cool water (the sink works great). The skins while come right off after they cool enough to handle. Don't forget about your onion and garlic while doing this. Once they are browned just take them off heat but leave them sitting in the pot.

4) Once your tomatoes are peeled, cut them in half, hold them cut side down over a bowl and give them a squeeze. This will get rid of a lot of the extra juice and most of the seeds. It is also messing so make sure you use a deep bowl to prevent the juice from squirting out into your kitchen. After you've squeezed them, roughly chop them and throw them in the pot with the onion and garlic.


5) Bring your mixture to a boil and reduce heat. Add lots of salt and a few dashes of pepper to taste. Simmer for 30 minutes stirring occasionally. This is a good time for clean up or a relaxing cup of coffee.


6) Add your basil then remove the sauce from heat and allow to cool slightly. In batches, using a food processor or blender, liquefy your sauce. Return to pot.


7) Simmer sauce for another 15 minutes or until it is the thickness you want.

8) Spoon sauce into jars and water bath for 15 minutes.


Notes:

-Romas are the best tomato to use for this, but any work. The benefit of Romas is they have far more meat to juice so you spend less time simmering the sauce. I made this sauce with a mix.

-If you like to drink tomato juice, just strain the seed out of the juice you squeezed and can that too!

Addition: My mom had a recommendation on what to do if you have less than a jarfull left over.

"When I can tomatoes and cook the tomatoes with onions, pepper and celery, I usually don’t have exactly the right amount to fill up quarts. Wednesday when I canned I had about 1 ½ cups of tomatoes left over so here is how I managed not to waste anything…..pour the leftovers through a strainer into a bowl, add a few dashes of Trader Joes 21 spices and let it sit a bit while cleaning up. Then pour the juice that strained out into a cup, add several ice cubes and a shot or two of your favorite vodka or gin. Stir, sit back, sip and contemplate how good that homemade chili is going to be this winter. Works wonders for a tired soul (or tired feet)."

Thursday, August 27, 2009

Canning Peaches

Earlier this week I got together with my fellow caners and put up about 4o lbs. of peaches. These are the same peaches I mentioned before that I got for 59 cents a pound. When canning peaches your two options are basically to either cold pack them which means you put the uncooked chopped fruit in the jar and then pour hot syrup over them, or you can heat the fruit up in the syrup itself. This method will make your peaches a lot softer. Since we want to keep the firmness of the fruit we chose the first method.

While I take great satisfaction in canning my own food, which I know will make tasty treats all winter, I also really enjoy the social aspect of canning. Truly, it's not "fun" work. By the time you are done you are sticky, your feet and knees are killing you and the kitchen is a disaster zone. However, if you have a good group of people whom you like to hang out with doing the work, then it can be lots of fun. You can't tell me Damian isn't enjoying himself.


While I think there is a lot of good information on the Internet and any reasonably intelligent person could do it, it is helpful to have a Yoda. This is ours. If nothing else, this person can serve to reassure the novice that yes the mixture is supposed to look like that.


Do not be fooled though, even with a Yoda accidents can happen. This is the first time we used the lid on our water bather. We did not however, use the rack. One might wonder what happens when the water gets hotter than normal (thanks to the lid) and the glass jars are resting on the bottom. If you haven't guessed, the glass jars might explode. Like this the one below, and you will open your caner after 20 minutes to find lots of peach slices floating on top. When you are tired and sticky this is exceptionally disheartening. I wouldn't recommend it.


Of course at moments like these, the most important thing is to keep your spirits up and not loose your temper. Especially when everyone is armed with sharp knives!


Even though it wasn't perfect, we were still successful, and we had a good time. The basics of cold packing peaches are:


1) Pit, peal and slice peaches (whatever size you want)

2) Fill jar till there is about 3/4 to 1/2 an inch of head space

3) Make a syrup to go in the jars. We did a light syrup of 1 cup of water to 3 Tbs. of sugar.

4) Pour this hot syrup into jars and run a butter knife or spatula around the inside of the jar to release bubbles. Wipe lip of jar to ensure a good seal.

5) Put lid and ring on jars (making sure its not super tight) and put in water bather for 20 minutes.

6) Remove from water bather and allow the jars to cool. If they pop within about a 1/2 hour then they've sealed, if not, put them in the fridge and eat soon.

Tuesday, August 25, 2009

Peach Pecan & Amaretto Preserves

I've had a request for the recipe for some preserves I made as christmas presents a few years back. This one definitly seemed like the one that got the best reviews of all the contents in my Christmas Baskets.

The recipe is super simple and goes great over ice cream, waffles and sheet cake. If you've used it for anything else that was super tasty, leave a comment about it so the rest of us can try it too! Oh and I should admit I did not come up with this recipe myself. I found it here.

Ingredients:

2 lbs peaches, peeled
1 cup golden raisin
3/4 cup water, more if needed
1 1/2 tablespoons finely grated orange zest
2 tablespoons strained fresh lemon juice
3 cups sugar
1/2 cup pecan halves or pecan pieces
3 tablespoons amaretto liqueur


Directions

1) In a heavy, non-reactive saucepot combine raisins and water and let raisins soak until they plump.

2) Cut peaches into halves or quarters and combine them with the plumped raisins and water.

3) Add zest and heat mixture to simmering until very tender, about 15 minutes.

4) Stir in orange and lemon juices and return to a boil.

5) Add sugar and cook over medium heat, stirring very frequently with a flat bottom wooden spoon, until thick, about 30 minutes.

6) Test Mixture: Put a spoonful on a chilled saucer and let it cool; when saucer is held on edge, the surface of the jam should wrinkle.

7) Add the pecans and cook, stirring, about 5 minutes longer.

8) Remove from heat and stir in the Amaretto.

9) Ladle into hot, clean canning jars, leaving 1/4 inch head space.

10) Seal with new two-piece lids according to manufacturer's directions and process for 10 minutes in a boiling water bath.

11) Cool, label, and store.

12) Best if allowed to mellow in the jars for two weeks before serving.