We ended up with a decent amount of prickly pear juice from our five gallons of fruit. Since I have a tendency to forget things in the fridge (only to be discovered by my frustrated husband a couple of weeks latter), we froze a little over half the juice for future projects. I have also learned when working with something new it isn't a pleasant surprise to make one huge batch of something only to find out you don't really care for it. This happened with our prickly pear jam that we made last year. I'm not a big jam person in the first place, but the stuff tasted like jolly ranchers. Waaaay to sweet for my breakfast taste. Learning from that experience, I started small with our prickly pear syrup experiment.
Standard syrup recipes seem to go for a 1:1 ratio of sugar to juice. Prickly pear juice is fairly sweet on its own, so I decided to use a 1:2 ratio of sugar to juice. I think it resulted in a thinner syrup, but that's ok since I am mostly using my syrup for drinks. Even with a 1:2 ratio this stuff is pretty sweet, and you could certainly up the amount of lemon juice you put in it if you'd like to tart it up a bit.
You might be asking yourself, what does prickly pear taste like. People generally describe it as being watermelonesk. While this is pretty close, I think Jeff described it perfectly when he said it tasted like watermelon mixed with peach. For some reason the juice got a little smokey touch to it after I simmered it (maybe from the thorn removal). I don't remember it being that way when we drank it fresh.
Plain Prickly Pear Syrup
6 cups of prickly pear juice
3 cups of sugar
3 lemons
1) Stain your prickly pear juice so its nice and clear. First run it through a metal mesh strainer and then through cheese cloth.
2) Add the prickly pear juice, the sugar and the juice of three lemons to a pot and gently simmer for 15 minutes.
3) Remove pan from heat and allow to cool. If you like to can you can water bath can the syrup to make it shelf stable. If you will be using your syrup as a mixer for alcoholic beverages, you can add a shot of vodka to it (works as a preservative) and store it in the fridge.
Some fun additions you can add if you plan to use the syrup for things such as french toast are cinnamon and vanilla. I split my batch in two and added one stick of cinnamon to it while it simmered and then let it steep in the syrup for about an hour afterwards. When I bottled it I just removed the stick and added a tiny splash of vanilla extract. If you have a vanilla bean you could use that instead and just let it steep along with the cinnamon. The spiciness of the cinnamon complimented the sweet of the syrup nicely.
Showing posts with label Recipes. Show all posts
Thursday, October 25, 2012
Tuesday, July 31, 2012
A Little Bit of Everything
I've been a little uninspired to blog lately. I don't feel like any one thing that has happened is worthy of an entire blog post, but I have been taking a few pictures of things thinking I might eventually feel inspired to blog. So here is a post about a little bit of everything, home, food and a baby thrown in at the end. Enjoy.
We recently bought a big clothes drying contraption at Costco. Its main use will be for drying baby diapers because the sun works as a natural bleaching and deodorizing tool. It also seemed a little more earth friendly since you have to run cloth diapers through the dryer several times to get them completely dry. One problem this has brought up though is that clothing that is line dried tends to be scratchy and stiff. Am I doing something wrong? People talk about how wonderful line dried sheets are, but if they are anything like line dried diapers then I have to imagine slipping into line dried sheets would be rather scratchy and uncomfortable. I've started putting them in the dryer on a heat less cycle after they are dry just to soften them up, but this sort of defeats the purpose and seems like a ridiculous extra step. I would try fabric softener but everything online says those will lessen the absorbency of the diaper. Any ideas?
In food related news, I made a fool the other day. A fool is a simple old fashion dessert that is basically a fruit compote folded into whipped cream. I know I'm not suppose to be eating dairy right now, but I had a bowl full of fresh picked strawberries sitting on my counter and couldn't resist trying it. I think this would have worked better with a tart fruit (the original recipe called for rhubarb) or one with more body, but it was still pretty delicious. I also saw some ideas online for strawberry fools that add a little basil to it. I wasn't feeling brave the day I made this so I left it out, but next time I'll add it. Whatever fruit you choose to use, this would be a great way to use up leftover cream. It always seems like during the holidays I have recipes that call for a cup of cream and then I have to find uses for the rest. Generally it ends up being a treat in my morning coffee, but this could be a fun way to change it up.
Ok, so if you know how to make whipped cream you don't really need a recipe for this one, but here ya go. I didn't measure anything when I was making this but these general amounts made two big fools (hey wait a minute...). I think next time I'd use something more the size of a whiskey glass. These could be a great way to make a pretty dessert for a dinner party without a lot of effort because you could do that fruit ahead of time and just whip up the cream after dinner.
Strawberry Fool "Recipe"
ingredients
+/- 1 cup of whipping cream
1-2 tbsp. powdered sugar
a splash of vanilla extract
+/- 2 cups of strawberries quartered
2 tbsp. sugar
1) Wash and quarter the strawberries and then add the sugar. Allow to sit for at least a half and hour until they get juicy. Then, mash them with a fork.
2) Add remaining ingredients to a bowl and whip with an electric mixer until its the consistency of thick whipped cream. You'll want it a little stiffer than you would normally make it because its going to sit for a bit.
3) Layer ingredients in a glass and then spiral a spoon down into it and back up. Refrigerate for a half and hour and then enjoy with a couple of shortbread cookies.
And now on to Baby. She's been having mild but continuing diaper rash issues lately so I've been trying to give her some diaper free time every day. While we still haven't been able to completely clear up the rash, it has led to some cute pictures.
Well that's it for my jumbled theme-less blog post. Hope you all are having more inspired weeks than me!
We recently bought a big clothes drying contraption at Costco. Its main use will be for drying baby diapers because the sun works as a natural bleaching and deodorizing tool. It also seemed a little more earth friendly since you have to run cloth diapers through the dryer several times to get them completely dry. One problem this has brought up though is that clothing that is line dried tends to be scratchy and stiff. Am I doing something wrong? People talk about how wonderful line dried sheets are, but if they are anything like line dried diapers then I have to imagine slipping into line dried sheets would be rather scratchy and uncomfortable. I've started putting them in the dryer on a heat less cycle after they are dry just to soften them up, but this sort of defeats the purpose and seems like a ridiculous extra step. I would try fabric softener but everything online says those will lessen the absorbency of the diaper. Any ideas?
Ok, so if you know how to make whipped cream you don't really need a recipe for this one, but here ya go. I didn't measure anything when I was making this but these general amounts made two big fools (hey wait a minute...). I think next time I'd use something more the size of a whiskey glass. These could be a great way to make a pretty dessert for a dinner party without a lot of effort because you could do that fruit ahead of time and just whip up the cream after dinner.
Strawberry Fool "Recipe"
ingredients
+/- 1 cup of whipping cream
1-2 tbsp. powdered sugar
a splash of vanilla extract
+/- 2 cups of strawberries quartered
2 tbsp. sugar
1) Wash and quarter the strawberries and then add the sugar. Allow to sit for at least a half and hour until they get juicy. Then, mash them with a fork.
2) Add remaining ingredients to a bowl and whip with an electric mixer until its the consistency of thick whipped cream. You'll want it a little stiffer than you would normally make it because its going to sit for a bit.
3) Layer ingredients in a glass and then spiral a spoon down into it and back up. Refrigerate for a half and hour and then enjoy with a couple of shortbread cookies.
And now on to Baby. She's been having mild but continuing diaper rash issues lately so I've been trying to give her some diaper free time every day. While we still haven't been able to completely clear up the rash, it has led to some cute pictures.
Well that's it for my jumbled theme-less blog post. Hope you all are having more inspired weeks than me!
Thursday, June 28, 2012
Lemon Bundt Cake with Boozy Berries
Hello friends, I know what you're all thinking. Why oh why do you have to look at so many adorable baby posts when what you really want is a tasty recipe or garden post. Well fear now more, today I have a fun summer recipe for you that also happens to involve alcohol. You're welcome.
I have been neglecting my strawberry patch this year. I'm pretty sure many a good berry has been eaten by birds or withered in the sun because I haven't gotten to it in time. While that thought makes me sad, it is simply the reality right now while I learn how to be a mom and a garderner and a housewife and an individual and a...well you get the idea. All in all I'm pretty pleased with the amount I have been able to get done in the garden so far, and I was very excited to notice a decent little crop of berries just as a friend was coming to stay the night. I was able to whip up this cake and berry combo quickly and it made a great dessert to cap off a lovely summer day. The boozy berries were inspired by this post from David Lebovitz and the cake from this Southern Living recipe.
I think these boozy berries would also be good over a lemon pound cake, but apparently pound cake requires an unholy number of eggs so I switched to bundt cake instead. I started the berries soaking early in the afternoon so they'd be good and marinated and their juices would leach out. The cake took all of ten minutes to whip together and then I let it bake while we ate our dinner. Does anyone else have a favorite summer go to dessert?
Lemon Bundt Cake with Boozy Berries
Cake ingredients
1 cup salted butter at room temp.
1 1/2 cups granulated sugar
1/3 cup lemon juice
zest of 1 lemon
5 eggs
3 cups all- purpose flour
2 tsp. baking powder
2/3 cup almond milk (or regular milk)
Fruit topping ingredients
2 cups strawberries, cleaned and cut into bite size pieces*
1 soup spoon of sugar
semi-sweet white wine such as sauvignon blanc
Directions
1) Place strawberries in a bowl, top with sugar and let sit for 15 minutes or so. Then add enough wine to completely cover them. Let them soak in the fridge until ready to serve, preferably three or four hours.
2) Preheat oven to 350.
3) In a large bowl cream sugar and butter together with an electric mixer until light and fluffy, add lemon juice and zest and blend until well combined.
4) Beat in eggs one at a time, make sure each egg is fully incorporated before adding the next.
5) In a separate bowl mix the flour and baking powder. Add to the wet batter in three batches alternating with the almond milk. Start and end with the dry ingredients.
6) Pour batter into a greased 12 cup bundt cake pan. Bake for 50-60 minutes or until it starts to pull away from the sides of the pan and and springs back when poaked. Let cool for five minutes and then invert on a cooling rack or plate.
7) Serve slices of cake covered with with boozy berries. The cake is dense but not overly moist so you'll definitely want to pour a generous amount of the berry liquid over it as well. The cake will hold up to getting wet.
* This was enough berries for three people. Adjust according to how many you're feeding. The cake itself could easily feed 7-8 depending on how big you slice it. I would not plan on making more berries than you need for that day.
I have been neglecting my strawberry patch this year. I'm pretty sure many a good berry has been eaten by birds or withered in the sun because I haven't gotten to it in time. While that thought makes me sad, it is simply the reality right now while I learn how to be a mom and a garderner and a housewife and an individual and a...well you get the idea. All in all I'm pretty pleased with the amount I have been able to get done in the garden so far, and I was very excited to notice a decent little crop of berries just as a friend was coming to stay the night. I was able to whip up this cake and berry combo quickly and it made a great dessert to cap off a lovely summer day. The boozy berries were inspired by this post from David Lebovitz and the cake from this Southern Living recipe.
| I used butter to grease my pan and did not dust it with flour. This resulted in an awesomely crip outside of the cake. |
I think these boozy berries would also be good over a lemon pound cake, but apparently pound cake requires an unholy number of eggs so I switched to bundt cake instead. I started the berries soaking early in the afternoon so they'd be good and marinated and their juices would leach out. The cake took all of ten minutes to whip together and then I let it bake while we ate our dinner. Does anyone else have a favorite summer go to dessert?
Lemon Bundt Cake with Boozy Berries
Cake ingredients
1 cup salted butter at room temp.
1 1/2 cups granulated sugar
1/3 cup lemon juice
zest of 1 lemon
5 eggs
3 cups all- purpose flour
2 tsp. baking powder
2/3 cup almond milk (or regular milk)
Fruit topping ingredients
2 cups strawberries, cleaned and cut into bite size pieces*
1 soup spoon of sugar
semi-sweet white wine such as sauvignon blanc
Directions
1) Place strawberries in a bowl, top with sugar and let sit for 15 minutes or so. Then add enough wine to completely cover them. Let them soak in the fridge until ready to serve, preferably three or four hours.
2) Preheat oven to 350.
3) In a large bowl cream sugar and butter together with an electric mixer until light and fluffy, add lemon juice and zest and blend until well combined.
4) Beat in eggs one at a time, make sure each egg is fully incorporated before adding the next.
5) In a separate bowl mix the flour and baking powder. Add to the wet batter in three batches alternating with the almond milk. Start and end with the dry ingredients.
6) Pour batter into a greased 12 cup bundt cake pan. Bake for 50-60 minutes or until it starts to pull away from the sides of the pan and and springs back when poaked. Let cool for five minutes and then invert on a cooling rack or plate.
7) Serve slices of cake covered with with boozy berries. The cake is dense but not overly moist so you'll definitely want to pour a generous amount of the berry liquid over it as well. The cake will hold up to getting wet.
* This was enough berries for three people. Adjust according to how many you're feeding. The cake itself could easily feed 7-8 depending on how big you slice it. I would not plan on making more berries than you need for that day.
Friday, June 1, 2012
A Clean Milkless Dessert
For savory foods, this has generally just meant hold the cheese, but for desserts it has posed a bigger problem. It seems the majority of my favorite store bought treats have milk involved. Ice cream is obviously out, along with most brownies, puddings, cakes, etc. I am turning to making stuff from scratch now so that I can switch cows milk for almond milk, but this takes a decent chunk of time and forethought. I can't wait until a craving strikes me at 8:000 or 9:00 to get started.
The last couple of nights I have been thinking of some quick treats I can make last minute by turning to my trusty milk free dark chocolate bar from Trader Joes. One nice thing about Trader Joes products is that they list any common allergens their foods contain so I don't have to search the whole label looking for milk.
A few nights ago, after discovering that their gram crackers are milk free, I melted a little chocolate and spread a thin layer over one side of the gram cracker and then popped them into the freezer for a few minutes to harden up. Nom Nom.
Last night, I decided to get even more creative and made homemade peanut butter cups. Jeff said he thought they'd be better if I added a little powdered sugar to the peanut butter first. While I agree this would make them more like Reese Peanut Butter Cups, I liked that these only had two ingredients, only made a coffee cup and a spoon dirty and I think they qualify under the clean eating guidelines because they are dark chocolate. They are certainly rich enough without the sugar, but its up to you. Here is the "recipe."
Down and Dirty Peanut Butter Cups
Ingredients
10 squares of Trader Joes Pound Plus dark chocolate bar
3-4 Tablespoons all natural salted peanut butter
1) Place the chocolate in a coffee mug and microwave in 30 second bursts, stirring between heatings. It should only take three times to be completely melted.
2) Spread thin circles of chocolate onto a plate or cookie sheet covered in parchment paper. Mine were a bit bigger than 50 cent pieces, but you can make them as big or as small as you want your finished cup to be.
3) Drop a little dollop of peanut butter in the middle of the chocolate circle and then cover with another thin layer of chocolate.
4) Place Peanut Butter Cups in the fridge for about a half an hour to harden up and enjoy!
Notes:
Keep your chocolate layers thin. By the time you add two layers of chocolate and a layer of peanut butter these things can be a bit much if you make them too thick. More is not always better.
This recipe makes six large peanut butter cups and I could only eat two before I'd had my sweets quota for the day.
You could also make these in a cupcake pan if you wanted a more cup like experience. I was in a hurry and was concerned they'd stick to the cupcake papers and make a mess. If you try it and are successful leave me a comment and let me know.
Wednesday, April 11, 2012
Potatoes Au Gratin
I am a big fan of cheese and potatoes, so the two together are sure to be a hit with me. I made this recipe for Easter Sunday, and there were no leftovers so I can only assume people were pleased. I tweaked a recipe from Cooking Light (which is not where I would think to look for a recipe that is dairy based) and I certainly think the flavor held up well even though it wasn't made with cream like most of the other recipes I found.
There were a few things that I particularly liked about this recipe. One, it was rich but not over the top. I felt that keeping it a little lighter was a good idea considering how much other food I was going to be eating that day. The fact that this is a less guilty version of potatoes au gratin also means I'd be more likely to make it for a regular dinner side dish. Second, I like recipes that can be made with stuff I generally stock in my kitchen. I don't generally keep cream on hand, so if I have a recipe that calls for it that means I will either be trying to find uses for the remaining cream for the rest of the week or forgetting it in the back of the fridge where good food goes to die. Third, I was able to do most of the prep ahead. I probably could have done everything ahead and then baked it at my in-laws but I ran out of time Easter morning. I ended up chopping the onion and garlic ahead of time and mixing everything else into the milk. That meant I just had a couple of Tupperware containers and a sack of potatoes to pack up to Sacramento.
Potatoes Au Gratin Light
original recipe here
Ingredients
2 Tbsp. Butter
1 medium onion
5 garlic cloves
4 Cups 2% Milk
1 Tsp. Salt
1/4 Tsp. Pepper
2/3 Cup of Flour
8 oz. Shredded Sharp Cheddar Cheese
1/2 Tsp. Thyme (optional)
3 Lbs potatoes peeled and thinly sliced
1) Preheat oven to 350 degrees.
2) Melt butter in a pot and add the onions and garlic cooking until soft (about 5 minutes).
3) In a separate bowl mix the milk, salt, pepper, thyme and flour. Once they are well combined, pour into the pan with onions and garlic. Bring the mixture to a simmer and cook until it thickens slightly (about 2 minutes).
4) Add 6 oz. of cheese to the milk mixture and stir until melted.
5) Fill a 9x13 baking dish with potatoes and pour milk mixture over them. Top with remaining cheese.
6) Cover with foil sprayed with cooking spray and bake for 45 minutes. Uncover potatoes and continue to bake for another 30 minutes or until potatoes are tender.
There were a few things that I particularly liked about this recipe. One, it was rich but not over the top. I felt that keeping it a little lighter was a good idea considering how much other food I was going to be eating that day. The fact that this is a less guilty version of potatoes au gratin also means I'd be more likely to make it for a regular dinner side dish. Second, I like recipes that can be made with stuff I generally stock in my kitchen. I don't generally keep cream on hand, so if I have a recipe that calls for it that means I will either be trying to find uses for the remaining cream for the rest of the week or forgetting it in the back of the fridge where good food goes to die. Third, I was able to do most of the prep ahead. I probably could have done everything ahead and then baked it at my in-laws but I ran out of time Easter morning. I ended up chopping the onion and garlic ahead of time and mixing everything else into the milk. That meant I just had a couple of Tupperware containers and a sack of potatoes to pack up to Sacramento.
Potatoes Au Gratin Light
original recipe here
Ingredients
2 Tbsp. Butter
1 medium onion
5 garlic cloves
4 Cups 2% Milk
1 Tsp. Salt
1/4 Tsp. Pepper
2/3 Cup of Flour
8 oz. Shredded Sharp Cheddar Cheese
1/2 Tsp. Thyme (optional)
3 Lbs potatoes peeled and thinly sliced
1) Preheat oven to 350 degrees.
2) Melt butter in a pot and add the onions and garlic cooking until soft (about 5 minutes).
3) In a separate bowl mix the milk, salt, pepper, thyme and flour. Once they are well combined, pour into the pan with onions and garlic. Bring the mixture to a simmer and cook until it thickens slightly (about 2 minutes).
4) Add 6 oz. of cheese to the milk mixture and stir until melted.
5) Fill a 9x13 baking dish with potatoes and pour milk mixture over them. Top with remaining cheese.
6) Cover with foil sprayed with cooking spray and bake for 45 minutes. Uncover potatoes and continue to bake for another 30 minutes or until potatoes are tender.
Thursday, March 3, 2011
Creamed Whiskey
A Little Ramble Before We Begin
I have found that writing a blog often puts one in the situation of asking why. For example, why did I decide to bake a cake at 10 pm when I am supposed to be on a diet, or why am I making twice as much work for myself by having to constantly wash my hands so that I can take pictures? The answer to these types of questions is generally something along the lines of because I love to do domestic things and I love to write, and to do the latter I must do the former and to do the former I must force myself to find the time. Then however, there are these other types of questions. For example, why did I decide to pull out the crystal champagne coupes for this picture, why did I decide to take it on a bookshelf and best of all why did I wait until 9:00 am as I was getting ready for work to do my taste test of the different creamed whiskey's I'd made? Well, I don't really have a good answer to any other those, especially the last one, but I can assure you that somehow it all works out and I'm most appreciative that you all seem to just go along with it. Especially my husband who caught me in the kitchen this morning drinking booze. Thanks for understanding.
And Now, The Whiskey
Note: You don't need a great whiskey for this. Put the cork back in the 12 year McCallan and pull out the Bushmills.
A simple internet search can pull up many recipes for homemade versions of Baileys, but most of them are pretty similar. The biggest difference seems to be whether people added eggs or not. I decided to not bother with the recipes that had eggs in them because it would drastically shorten the shelf life of my beverage, and despite what you might have been told, I can't drink a whole jug of Baileys in a week. I did decide to try two different batches, one sweetened with honey and one with condensed milk, to see if one yielded noticeably better results. I got the idea after reading that Carolans (my personal favorite) uses honey in the production of their creamed whiskey. I thought that a rich dark honey could add an earthy flavor to the mix.
I also changed my recipe from the norm by omitting or substituting a couple ingredients in both batches. First, most recipes call for instant coffee powder to be added. This kind of grossed me out. I said thanks but no thanks. While I don't doubt the addition of coffee flavoring would be good, I just have a mental block against using instant coffee. If you have an espresso machine though, a shot added to the batch could be quite good. Second, all the recipes call for chocolate syrup. I don't own any chocolate syrup, so I melted the equivalent amount of bar chocolate and added that. It mixes in just fine and doesn't separate back out once the mixture is chilled. Third, while both batches I made have almond extract in them, I would leave it out next time, or just add the tiniest splash. It has an overwhelming scent and the taste leaves the kind of burn in the mouth feel that bad whiskey does. Now granted, I was also using bad whiskey, but when I sampled the batch before adding the almond extract, the taste was far less pronounced.
Alright, now that I have taken you on the journey of exploration that is creamed whiskey making, here's the recipe I worked out.
Creamed Whiskey
Ingredients
1 cup of heavy cream
1 14 oz. can condensed milk
1 3/4 Cups Irish Whiskey
2 Tsp. vanilla extract
2 Tbsp. melted chocolate/chocolate syrup
Optional Additions
1 shot of espresso
1/2 Tsp. almond extract
Directions
Mix all ingredients in a blender for 30-60 seconds until well combined. Pour into a tight sealing, preferably cute, jar and place in the fridge to chill.
Now you may remember I said I tried two batches but only gave one recipe. What's up with that?! Well, I found the honey version to not be noticeably different taste wise. If you wish to make that version, substitute the condensed milk for 2/3 cup of honey. This will however, be more expensive than using the condensed milk. I wouldn't have tried it if I didn't have an over abundance of honey at the moment. In addition to not changing the flavor, I found the honey version to be a little less pleasing in terms of mouth feel. The version with condensed milk feels creamier and fuller, while the honey version feels a little weak and thin. Finally, the honey version also separates out and doesn't look as nice as the condensed milk version in the fridge. Of course a good shake can take care of that. So experiment, it's up to you!
Friday, February 25, 2011
Lemon Curd
In the continuing what can I do with all these lemons saga, I decided to try my hand at some lemon curd. I had read a blog a while back about making curds and had filed it away under the someday category of my brain but I had honestly forgotten about it as I stared at my pile of lemons over the last couple of weeks. I had been waiting for them to speak to me, like a sculptor staring at a blank rock waiting for it to tell him what it's meant to be. Then, a week ago I had a baking day with some friends, one of whom brought a jar of lemon curd her mother had made. Suddenly that filed away blog post came running back into my mind and I felt silly for not having remembered it earlier. A brief Internet search later I marched into my kitchen with a recipe in one hand and a basket of lemons in the other, ready to create that beautiful mixture of sunshine and happiness that is lemon curd.
Before I launch into the recipe, I know some of you may still be stuck thinking, lemon what? Lemon curd, which is sometimes also referred to as lemon cheese, became popular in England and America in the 1800s as an accompaniment to toast, scones, muffins, etc. during afternoon tea. It can also be used as a filling for cakes and tarts. The most popular form in which you are most likely to have encountered it is in lemon meringue pie, the bottom half of which is lemon curd. Lemon curd is similar to lemon custard, but curds contain more juice and zest than custards, which makes their flavor more intense. Oh and just in case you aren't particularly fond of lemon, curds can be made with any citrus and even other fruits such as blueberries and raspberries!
Lemon Curd aka Sunshine on a Spoon
recipe from Fine Cooking
Ingredients
6 Tbsp. soft unsalted butter
1 cup of sugar
2 whole eggs
2 egg yolks
2/3 cup of lemon juice
1 tsp. lemon zest
Directions
1) In a large bowl beat the sugar and butter together with an electric mixer for about 2 minutes.
3) Beat mixture for 1 minute then add the lemon juice. Be sure to strain the lemon juice to get all the bits of pulp out so your curd comes out smooth. Cheese cloth works great for that.
4) Heat the mixture in a non-reactive pan over medium heat for about 15 minutes stirring gently but constantly. Do not let the mixture boil. The curd is done when it reaches 170 degrees or when it has thickened significantly and your finger leaves a path through it on the back of a spoon.
5) Remove curd from heat and add zest. Allow to cool slightly then transfer to a bowl and cover with plastic wrap so that the wrap is touching the curd. This will prevent a skin from forming on top of the curd as it cools. Refrigerate overnight and then transfer to permanent lidded containers such as canning jars.
*Notes
-When you first add the lemon juice the mixture may curdle a bit, don't worry, it'll all melt together.
-The curd is very hot at 170 degrees. Be prepared for it to hurt your finger if you use the spoon test.
-This batch should make roughly two cups of curd (total estimate, I didn't measure).
- Curd will keep in the fridge for a couple weeks, or you can freeze it and use it over the next six months or so.
-Be careful when heating your curd that you don't overcook it. It quickly goes from being about 150 to being 170. I got surprised by that and ended up cooking mine up to about 180. It tastes fine, just not quite as awesome as it would have.
Before I launch into the recipe, I know some of you may still be stuck thinking, lemon what? Lemon curd, which is sometimes also referred to as lemon cheese, became popular in England and America in the 1800s as an accompaniment to toast, scones, muffins, etc. during afternoon tea. It can also be used as a filling for cakes and tarts. The most popular form in which you are most likely to have encountered it is in lemon meringue pie, the bottom half of which is lemon curd. Lemon curd is similar to lemon custard, but curds contain more juice and zest than custards, which makes their flavor more intense. Oh and just in case you aren't particularly fond of lemon, curds can be made with any citrus and even other fruits such as blueberries and raspberries!
Lemon Curd aka Sunshine on a Spoon
recipe from Fine Cooking
Ingredients
6 Tbsp. soft unsalted butter
1 cup of sugar
2 whole eggs
2 egg yolks
2/3 cup of lemon juice
1 tsp. lemon zest
Directions
1) In a large bowl beat the sugar and butter together with an electric mixer for about 2 minutes.
2) Slowly add the eggs and yolks. Fully incorporate each egg/yolk before adding the next one.
4) Heat the mixture in a non-reactive pan over medium heat for about 15 minutes stirring gently but constantly. Do not let the mixture boil. The curd is done when it reaches 170 degrees or when it has thickened significantly and your finger leaves a path through it on the back of a spoon.
*Notes
-When you first add the lemon juice the mixture may curdle a bit, don't worry, it'll all melt together.
-The curd is very hot at 170 degrees. Be prepared for it to hurt your finger if you use the spoon test.
-This batch should make roughly two cups of curd (total estimate, I didn't measure).
- Curd will keep in the fridge for a couple weeks, or you can freeze it and use it over the next six months or so.
-Be careful when heating your curd that you don't overcook it. It quickly goes from being about 150 to being 170. I got surprised by that and ended up cooking mine up to about 180. It tastes fine, just not quite as awesome as it would have.
Thursday, February 24, 2011
Lemon Pickles
There is a blog I very much enjoy reading called Tigress in a Pickle. While I rarely get to pickle things because I live with a pickled food hater (and pickling for one seems like a lot of work), I still enjoy reading her always interesting recipes and partaking of her brief but witty posts. She does a lot with Indian flavors which I find rather interesting, and when she posted about Indian sun pickles I just had to give them a try.
You see, I have a plethora of lemons from my lemon tree/bush right now and have been at a loss for what to do with them. One can only drink so much lemon aide and I already have a batch of limoncello steeping! If you do not find yourself in my position, I'm pretty sure you probably have a neighbor who is and would love to unload some produce on you. If, however, you're neighbor is a stingy mean old man who would rather see his lemons rot on the ground than give a few to you, just remember, the cover of darkness is your friend.
These sun pickles also don't really resemble what westerners would consider to be a pickle, so I think Jeffry will find them tasty. Sun pickles are like preserved lemons, but with more interesting flavors than salt and cinnamon. The lemon juice and good old fashion sunshine are what pickles the lemons, so no vinegar taste here. I'm not entirely sure what I will do with these once they are done, but the Tigress recommends chopping them up and mixing them with some basmanti rice and a dollop of yogurt on the side. I figure I'll start there and then begin experimenting. Perhaps some mixed in with fresh steamed cauliflower? I halved her original recipe to be more realistic with my uses. Whether one is canning, gardening or crafting it's always important to keep your production in line with reasonable use (are you really going to use 30 handmade doilies?). No point in storing two liters of pickled lemons in your fridge if you're not sure you're even going to like them. If you do end up loving them, you can always make more!
Sweet n' Spicy Lemon Pickle
from tigress in a pickle
Ingredients
Directions
You see, I have a plethora of lemons from my lemon tree/bush right now and have been at a loss for what to do with them. One can only drink so much lemon aide and I already have a batch of limoncello steeping! If you do not find yourself in my position, I'm pretty sure you probably have a neighbor who is and would love to unload some produce on you. If, however, you're neighbor is a stingy mean old man who would rather see his lemons rot on the ground than give a few to you, just remember, the cover of darkness is your friend.
These sun pickles also don't really resemble what westerners would consider to be a pickle, so I think Jeffry will find them tasty. Sun pickles are like preserved lemons, but with more interesting flavors than salt and cinnamon. The lemon juice and good old fashion sunshine are what pickles the lemons, so no vinegar taste here. I'm not entirely sure what I will do with these once they are done, but the Tigress recommends chopping them up and mixing them with some basmanti rice and a dollop of yogurt on the side. I figure I'll start there and then begin experimenting. Perhaps some mixed in with fresh steamed cauliflower? I halved her original recipe to be more realistic with my uses. Whether one is canning, gardening or crafting it's always important to keep your production in line with reasonable use (are you really going to use 30 handmade doilies?). No point in storing two liters of pickled lemons in your fridge if you're not sure you're even going to like them. If you do end up loving them, you can always make more!
from tigress in a pickle
8 small very fresh lemons, no blemishes
2 small lemons, juiced
1 Tbsp. cayenne powder1 cup lightly packed brown sugar
1.5 Tbsp. sea salt
.75 Tbsp. whole fennel seeds.75 Tbsp. whole cumin seeds
.5 Tsp. whole fenugreek seeds
.75 Tbsp. whole peppercorns
1 liter jar with a tight fitting non-reactive (no metal) lid (I got my jar at cost plus, but I imagine ikea carries some good options too)
Directions
1) Wash your lemons and scrub any dirt off them. Make sure they are completely dry before moving to step two. Any water or yuck on your lemons could add to the risk of the batch going bad as it pickles.
2) Roast the fennel, cumin and fenugreek seeds in a dry pan over medium heat for a few minutes until they turn a shade darker and start to give off a toasty aromatic smell. Careful not to burn them. Once toasted, remove from the pan and grind the toasted seeds along with the salt and peppercorns. You can do this with a spice grinder or a mortar and pestle. This is a good task for your spouse/helpful friend while you do work on #3.
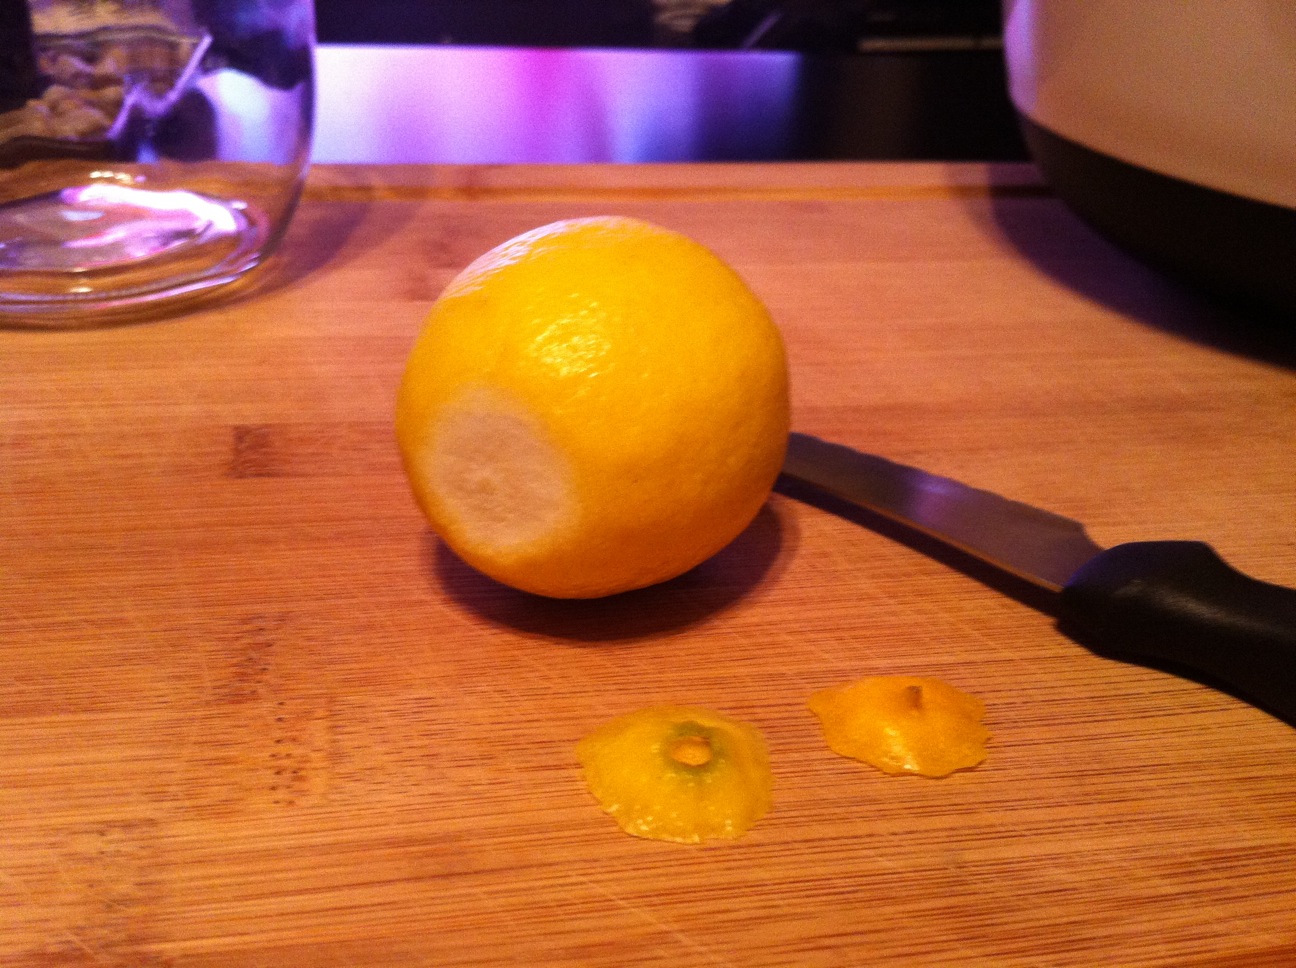
3) Cut off the two bump or scar ends on the lemons. Then cut them into medium sized chunks. I quartered mine, then sliced each quarter into two or three pieces. Remove any big seeds you find.
4) Mix your ground spices with the brown sugar and cayenne pepper.
5) Fill your very clean, very dry jar half way with lemons. These will shrink a lot over the next few days so don't be afraid to really pack them in there. Pour half the spice mixture over them and fill the jar the rest of the way with lemons. If your jar isn't full, you can always add more lemons than the recipe calls for. Top with the remaining spice mixture and the juice from two lemons.
6) Close the lid and shake vigorously!
7) Place jar in a sunny window for 8 weeks and shake once a day to distribute the spices. After the 8 weeks you can place the jar in the fridge where it should keep for a year.
*Notes
-Fenugreek is an indian spice and I highly recommend buying from a food co op. A whole jar of spices from the bulk bin at a co op costs about 50 cents. Refilling your spice jars from the bulk bins will save you a TON of monies.
-You can check the mixture at 7 weeks to check for doneness. If the liquid has thickened and the skins are soft they are done and can be put in the fridge.
Sunday, August 8, 2010
Blackberry Oat Buckle
I've been eyeing all the blackberry bushes in my area over the last couple weeks. With the abundance of rain we had late in spring, combined with my areas already high water table, I figured this season would be filled with plump juicy blackberries that would certainly find their way to my table. Over the weekend I couldn't wait any longer and took a little trip down Hwy 29 to see what I could find. Unfortunately they were all growing on pretty steep embankments, and I wasn't eager to repeat my spill last year when I slid down a blackberry hill (note: it's not the falling, but the getting back up that hurts the worse), so I just got what I could from the slightly less treacherous parts. Even with that restriction, it only took 30 minutes, and about twenty thorn scrapes, to have three and a half cups of bulging berries tucked away in my bag. Of course that not counting the ones I ate along the way!
From what I saw, only about half the berries on the bushes were ripe last Saturday. I'm sure there will be several more trips down to the patch before the season is over. Here is the first of my recipes involving one of my favorite parts of summer.
Blackberry Oat Buckle
Recipe adapted from
Cory Shreiber's
Rustic Fruit Desserts: Crumbles, Buckles, Cobblers, Pandowdies, and More
Ingredients
1 tbsp. butter for pan
1.5 cups flour
.5 cups oat flour
1 tsp. baking powder
.5 tsp. baking soda
.75 cups butter
1 cup sugar
2 eggs
1 tsp. vanilla extract
1 cup buttermilk
2.5 cups blackberries
.25 cups rolled oats
2 tbsp. brown sugar
Directions
1) Preheat oven to 350 and butter a nine inch square backing dish
2) Mix the regular flour, oat flour and backing soda. If you don’t have oat flour, simply chop up regular oats (aka oatmeal) in a food processor until it resembles a coarse meal.
3) In a separate bowl, cream together the butter and white sugar with a hand held mixer at high speeds until light and fluffy. Add the eggs one at and time and then the vanilla.
4) Stir the flour mixture into the butter/sugar mixture in three additions, alternating with the butter milk. Start and end with the flour mixture. The resulting batter will be much lighter/airier than a normal cake mix.
5) Fold in half of the blackberries and pour the mixture into the prepared pan.
6) Sprinkle the top of the buckle with the remaining berries, oats and brown sugar. Bake for 50 minutes or until a toothpick inserted into the cake comes out clean.
This cake can be served right away with ice cream as a wonderful dessert. The blackberries stay nice and juicy inside and ooze a bit when the buckle is sliced. It's also good the next morning without the ice cream as a delectable coffee cake. Its not an overly sweet buckle so you don't feel like you've started the day off with a sugar rush. Also feel free to substitute your favorite berry or even a mix of berries!
Thursday, July 15, 2010
Simple Sauce
Being a tomato lover who lives with a raw tomato hater, I have had to adjust. Big juicy slices of raw tomato sprinkled with salt no longer cuts it as a veggie option at dinner time, so I've had to come up with new ways to incorporate my lovely beauties into meals other than just slicing them. One that I've become quite fond of, is making a fresh chunky sauce out of them. It can go over just about anything from pasta to fish. This is an especially good use for tomatoes that are left over from other meals (such as burgers) and are about to go bad. Last night I cooked up this sauce and then quickly cooked two tilapia fillets in it. Yum.
Simple Sauce
3-4 Roma tomatoes (or whatever you have lying around)
2 tbsp. of olive oil
1 tsp. each of assorted dried Italian herbs (basil, oregano, parsley)
.5 tsp. of dried rosemary and thyme
a small handful of Parmesan cheese
several gloves of garlic or the dried equivalent
salt and pepper to taste
1) In the pan of your choosing add the olive oil, all the herbs/spices and Parmesan cheese. I used the shaved Parmesan and chopped it so that it was finer. If you are using the powdered Parmesan, a couple good shakes should do.
2) Roughly chop the tomatoes and add them to the pan.
3) Cook over medium heat until the tomatoes are nice and hot. Really once this happens you can stop anytime. The longer your cook, the less chunky your sauce with be so go with your mood. I prefer it just barely cooked because you can really taste the freshness of the tomatoes, but if you cook it longer it will more closely resemble store bought sauce in texture.
Simple Sauce
3-4 Roma tomatoes (or whatever you have lying around)
2 tbsp. of olive oil
1 tsp. each of assorted dried Italian herbs (basil, oregano, parsley)
.5 tsp. of dried rosemary and thyme
a small handful of Parmesan cheese
several gloves of garlic or the dried equivalent
salt and pepper to taste
1) In the pan of your choosing add the olive oil, all the herbs/spices and Parmesan cheese. I used the shaved Parmesan and chopped it so that it was finer. If you are using the powdered Parmesan, a couple good shakes should do.
2) Roughly chop the tomatoes and add them to the pan.
3) Cook over medium heat until the tomatoes are nice and hot. Really once this happens you can stop anytime. The longer your cook, the less chunky your sauce with be so go with your mood. I prefer it just barely cooked because you can really taste the freshness of the tomatoes, but if you cook it longer it will more closely resemble store bought sauce in texture.
Tuesday, May 18, 2010
Robin's Birthday Mac & Cheese
With Robin having a 50’s theme for her birthday, I thought back to my childhood days in the 50’s (OK a couple were in the 40’s) and remembered one of my favorite foods was macaroni and cheese. Of course, that was the “chedder only” version because, in the Midwest where I grew up, you didn’t ever do anything unusual or unique with food…mac and cheese was mandated by social law to be made from chedder cheese only.
When Robin and I were last in Disneyland we had some 4 cheese mac and cheese that was fantastic so I got on the internet and searched 4 cheese mac and cheese and came up with a very simple recipe that sounded like it was similar to the Disneyland version. I brought the ingredients to Robin’s and made it there. It went into the oven a soupy mess that I thought looked inedible but cooked up fine, and all the comments I got on it were great. It is not the creamy type that comes out of the Kraft box but more like the macaroni was coated with a very thick layer of dry cheese. Very unusual but very good. So if anyone wants to try it, here is the recipe as I made it.
Cook macaroni until just tender (I put the macaroni in the water before heating and timed it for 8 minutes after it began boiling). You definitely don’t want it mushy. Drain and set aside.
Heat 4 cups of cream (I used 2 cups of heavy whipping cream and 2 cups half and half because that is what I had) to scalding, remove from heat and stir in 4 ounces each of shredded chedder, jack, guyere and asiago cheese and mix until smooth. Mix with macaroni in an appropriate overproof casserole dish, top with bread crumbs and a small amount of grated parmesean. You can also add some Cajun seasoning to the bread crumbs…I added ½ teaspoon but would suggest more as the flavor was extremely mild…maybe 1 ½ to 2 teaspoons.
Bake at 375 for about 15 minutes or until top is browned. I let it sit for about 10 minutes before serving to let it set up some.
What little left overs I had went great with some ham and homemade applesauce the next day.
When Robin and I were last in Disneyland we had some 4 cheese mac and cheese that was fantastic so I got on the internet and searched 4 cheese mac and cheese and came up with a very simple recipe that sounded like it was similar to the Disneyland version. I brought the ingredients to Robin’s and made it there. It went into the oven a soupy mess that I thought looked inedible but cooked up fine, and all the comments I got on it were great. It is not the creamy type that comes out of the Kraft box but more like the macaroni was coated with a very thick layer of dry cheese. Very unusual but very good. So if anyone wants to try it, here is the recipe as I made it.
Cook macaroni until just tender (I put the macaroni in the water before heating and timed it for 8 minutes after it began boiling). You definitely don’t want it mushy. Drain and set aside.
Heat 4 cups of cream (I used 2 cups of heavy whipping cream and 2 cups half and half because that is what I had) to scalding, remove from heat and stir in 4 ounces each of shredded chedder, jack, guyere and asiago cheese and mix until smooth. Mix with macaroni in an appropriate overproof casserole dish, top with bread crumbs and a small amount of grated parmesean. You can also add some Cajun seasoning to the bread crumbs…I added ½ teaspoon but would suggest more as the flavor was extremely mild…maybe 1 ½ to 2 teaspoons.
Bake at 375 for about 15 minutes or until top is browned. I let it sit for about 10 minutes before serving to let it set up some.
What little left overs I had went great with some ham and homemade applesauce the next day.
Thursday, May 6, 2010
Lemon Garlic Dip
Last night Mr. Jeffry and I got to enjoy our first real harvest dish, home grown artichokes. In addition to our artichokes, we grilled chicken legs and sweet corn on the cob. Considering the fact that we don't have corn holders, it was a rather messy finger lickin' meal, but going animal style every once in a while has its appeal.
I've never really been satisfied with dipping my artichokes in butter or mayo, I always feel like something was missing, like it could be better than it was. So last night I tried a little experiment. I chopped up about a tablespoon of preserved lemon and added it, along with a 1/4 tsp. of garlic powder, to about 4 Tbsp. of mayo.
I mixed it up about an hour before we ate so it would have time to steep and let me tell you, I was not disappointed. Jeffry didn't seem to be quite as excited about it as me, but he was satisfied by the original butter/mayo options, so for him it was not a moment of long awaited fulfillment. We had some dip left over so I used it like regular mayo on the deli sandwich I was making for lunch. Once again, very pleased.
I've never really been satisfied with dipping my artichokes in butter or mayo, I always feel like something was missing, like it could be better than it was. So last night I tried a little experiment. I chopped up about a tablespoon of preserved lemon and added it, along with a 1/4 tsp. of garlic powder, to about 4 Tbsp. of mayo.
I mixed it up about an hour before we ate so it would have time to steep and let me tell you, I was not disappointed. Jeffry didn't seem to be quite as excited about it as me, but he was satisfied by the original butter/mayo options, so for him it was not a moment of long awaited fulfillment. We had some dip left over so I used it like regular mayo on the deli sandwich I was making for lunch. Once again, very pleased.
Thursday, April 15, 2010
Olive Tapenade
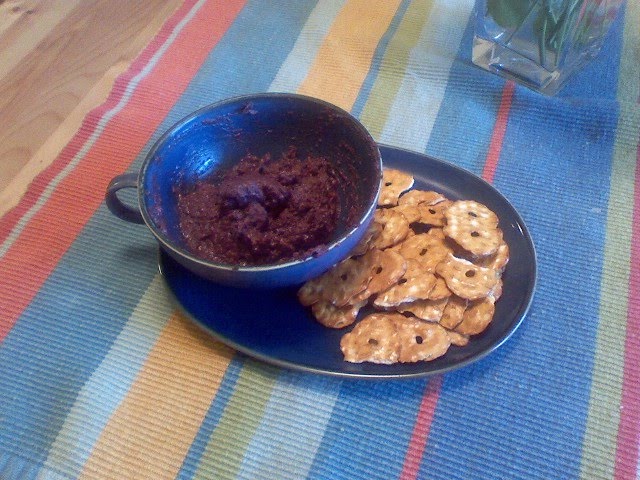
Last week Jeff and I had a couple friends over for a tasty Mediterranean inspired feast. When I realized that I should have purchased more meat for the main course, I decided I’d throw together a few extra appetizers to fill out the meal. Remembering that I had a good number of olives in the fridge, I decided it was time to try and make my own olive tapenade. This dish was so simple I think it will go on my go-to list for quick appetizers or last minute potluck dishes.
Easy Olive Tapenade
1 cup of kalamata olives, pitted
2 tbsp. olive oil
Skin from 1/3 of a preserved lemon
2 cloves of garlic
1) Roughly chop lemon and garlic.
2) Place all ingredients in a food processor and blend until finely chopped and well combined. Add more olive oil is necessary to get it to blend.
3) Scoop your tapenade into a bowl and serve with pretzel thins, crackers or pita!
Notes:
-you are not limited to only kalamata olives. Use your favorite or mix and match. I actually threw a few green ones in mine (minus the pimento) because I had them lying around.
-If you don’t have preserved lemon, you can substitute it for about a tbsp of lemon juice and a little zest.
-Tapenade traditionally has capers in it too; I didn’t have any on hand, but feel free to add a tablespoon of them as well.
Easy Olive Tapenade
1 cup of kalamata olives, pitted
2 tbsp. olive oil
Skin from 1/3 of a preserved lemon
2 cloves of garlic
1) Roughly chop lemon and garlic.
2) Place all ingredients in a food processor and blend until finely chopped and well combined. Add more olive oil is necessary to get it to blend.
3) Scoop your tapenade into a bowl and serve with pretzel thins, crackers or pita!
Notes:
-you are not limited to only kalamata olives. Use your favorite or mix and match. I actually threw a few green ones in mine (minus the pimento) because I had them lying around.
-If you don’t have preserved lemon, you can substitute it for about a tbsp of lemon juice and a little zest.
-Tapenade traditionally has capers in it too; I didn’t have any on hand, but feel free to add a tablespoon of them as well.
Monday, April 5, 2010
Pasta with Sage Browned Butter Sauce
Picture from Something Extra Magazine
As I mentioned in my last post, vegetarian meals aren't generally my thing, but I have found yet another vegetarian dish that I can't help but recommend. I am also a little shocked by the original source of this recipe, Raley's free monthly magazine Something Extra. Don't get me wrong, I always enjoy thumbing through this little magazine each month, but a lot of its energies are generally spent on getting you to buy some specific products over sharing tantalizing recipes. This month however, as I sleepily flipped through its glossy colorful pages, I found a dish that is amazing both in its taste and its simplicity: Pasta with Sage Browned Butter Sauce on page 28.
I have read several places about browning butter, but it was a new experience for me and definitely not hard at all. Just stir it a bit so it doesn't burn. I put this dish together in under thirty minutes before Jeff and I ran out the door for Good Friday services (hence the lack of my own picture) and it kept us nice and full all evening. I recommend pairing it with a fresh spinach salad to add a healthy dose of veggies into the mix. Enjoy!
Oh, and did I mention this was super cheap?
Pasta with Sage Browned Butter Sauce
adapted from Raley's Something Extra
Ingredients
8 oz. spaghetti
1/2 cup of butter
1.5-2 cups of peeled and diced butternut squash
2 tbsp. of fresh sage
2 tsp. balsamic vinegar
2 minced garlic cloves or 1 tbsp. of pre-minced garlic
shredded parmesan
2 small handfuls of toasted pine nuts
1) Cook the pasta according to packages instructions.
2) Meanwhile, in a large skillet, melt 1 tbsp. of butter. Add finely diced squash and cook, stirring frequently, for five minutes until soft. Pour into a bowl and set aside.
3) Add the remaining butter to the skillet and melt over medium heat. When the butter begins to foam, cook and stir for 2-3 minutes, just until it turns golden brown and smells nutty. Swirl or stir the pan several times to keep it from burning.
4) Remove the pan from heat and stir in the squash, sage, vinegar and garlic. Add pasta, toss well and season with salt and pepper to taste.
5) Serve immediately topped with toasted pine nuts and parmesan cheese.
Notes:
-This reheats really well in the microwave so make enough for leftover or you can make it ahead and pack it up if you’re going on a trip.
-Use the same seasonings used in this recipe to make a squash side dish. Just chop the butternut squash into large bite sized chunks, sauté in butter until soft and then add the vinegar, garlic and sage after you've turned off the heat. We had it this evening with fish and I got Jeff to actually say he enjoyed eating squash by itself now! Coming from him that's a major compliment!!
-One butternut squash can last for several meals, so plan to make something else out of your leftovers later in the week.
Friday, March 26, 2010
Irish Lamb Stew
Dear friends, we have come to the last day of Irish week and will resume regular posting come Monday. For my final post I've saved one of the main courses, traditional Irish stew. We also had corned beef and cabbage of course, but I can explain the makings of that in about 30 seconds. If you need it, give me a call. Irish stew, however, is more of an evening event that, while its not difficult, takes some time. For this recipe I chose to use lamb since it's the traditional choice and some of our friends don't eat beef. Beef is cheaper and more readily available, so feel free to substitute that if you like. I also think this recipe would be awesome with some herby or cheesy dumplings cooked on top!
Irish Lamb Stew
2 lbs. lamb shoulder
½ cup of flour
salt and pepper to taste
4 Tbsp. olive oil
2 bottle of Guinness Draught
2 cups of red wine
10 cups of beef stock
4 Tbsp. dried thyme
5 bay leaves
4 Tbsp. ketchup
6-7 medium sized red potatoes
6 large carrots, peeled
2 yellow onions, peeled
4 Tbsp. butter
2 large handfuls of chopped parsley
Chop lamb into bit sized pieces, removing any tough bits. In a bowl mix the flour, 1 Tbsp. of thyme and salt and pepper until well combined. Add the lamb to the flour mixture and stir to coat it. Heat the oil on medium-high heat in a large stock pot then add the meat. Cook the meat for several minutes on each side until all sides are nice and brown.
Once your meat is well browned, add the Guinness, red wine, beef stock, remaining thyme, bay leaves and ketchup to your pot. Stir well, bring the mixture to a boil, then reduce the heat to low and place a lid on the pot. Let simmer for 1 hour and 15 minutes.
While your pot is simmering, chop your potatoes and carrots into bite sized pieces, and finely chop the onion. In a separate pot from the meat, melt the butter on medium-high heat and add the potatoes, carrots and onion. Cook the veggies for about twenty minutes, stirring every few minutes. Try to time it so your veggies are done at the same time that your stew is done simmering (but remember its stew not rocket science, going a little over on the simmering time won’t hurt anything).
Once the veggies are done, add them to the stew pot. Simmer the ingredients together for another 20 minutes to combine the flavors. Ladle the stew into bowls and sprinkle with the chopped parsley.
This dish is really better eaten the next day, so make this up the night before and just reheat before serving. If this is more stew than you think your family can eat, the recipe is easily cut in half, or freeze the extra portion to have as a quick dinner for another day. The original recipe I based this one on came from a beef Irish stew recipe from dianasaura dishes.
Irish Lamb Stew
2 lbs. lamb shoulder
½ cup of flour
salt and pepper to taste
4 Tbsp. olive oil
2 bottle of Guinness Draught
2 cups of red wine
10 cups of beef stock
4 Tbsp. dried thyme
5 bay leaves
4 Tbsp. ketchup
6-7 medium sized red potatoes
6 large carrots, peeled
2 yellow onions, peeled
4 Tbsp. butter
2 large handfuls of chopped parsley
Chop lamb into bit sized pieces, removing any tough bits. In a bowl mix the flour, 1 Tbsp. of thyme and salt and pepper until well combined. Add the lamb to the flour mixture and stir to coat it. Heat the oil on medium-high heat in a large stock pot then add the meat. Cook the meat for several minutes on each side until all sides are nice and brown.
Once your meat is well browned, add the Guinness, red wine, beef stock, remaining thyme, bay leaves and ketchup to your pot. Stir well, bring the mixture to a boil, then reduce the heat to low and place a lid on the pot. Let simmer for 1 hour and 15 minutes.
While your pot is simmering, chop your potatoes and carrots into bite sized pieces, and finely chop the onion. In a separate pot from the meat, melt the butter on medium-high heat and add the potatoes, carrots and onion. Cook the veggies for about twenty minutes, stirring every few minutes. Try to time it so your veggies are done at the same time that your stew is done simmering (but remember its stew not rocket science, going a little over on the simmering time won’t hurt anything).
Once the veggies are done, add them to the stew pot. Simmer the ingredients together for another 20 minutes to combine the flavors. Ladle the stew into bowls and sprinkle with the chopped parsley.
This dish is really better eaten the next day, so make this up the night before and just reheat before serving. If this is more stew than you think your family can eat, the recipe is easily cut in half, or freeze the extra portion to have as a quick dinner for another day. The original recipe I based this one on came from a beef Irish stew recipe from dianasaura dishes.
Thursday, March 25, 2010
"Irish" Sweet Potato Bake
We have a new guest blogger with us today!! The lovely Miss Helen from Vacaville kindly agreed to share a post with us about the delicious sweet potato bake she brought to the St. Patrick's Day party. Unfortunately, Helen had to leave before we all sat down to dinner, so she missed most of the guests asking who made the sweet potatoes, followed by, "Tell Helen her sweet potatoes are amazing!" This dish would also be great as a substitute for the traditional candied yams when the Holiday Season rolls back around.
It was my great pleasure to attend the completely delicious St Patty's day party held by my dear friends Jeff and Robin last Saturday. Given that it's a party, especially one given in honor of a dude who drove snakes out of Ireland a la Samuel L. Jackson, how can one not bring food?I decided from the get-go that I wanted to make something different. Something homey and delicious, but devoid of potatoes since I knew they'd be prevalent (this comment should not in any way be construed as "oh look at me, I don't eat potatoes" because that simply isn't true. In fact, I'm eating a potato right now. Raw). But I still wanted to maintain the ethnicity in some way, which meant that my typical dates-stuffed-with-goat-cheese appetizer (ooooh that's a post all its own!) was out. Eventually after googling Irish side dishes I stumbled upon a recipe for a Sweet Potato Bake. I know I'm not alone in saying "I LOVE sweet potatoes!!!"
You may be asking yourself "how are sweet potatoes Irish?" Well, dear reader .... they're not and I was just as baffled as you are as to what about them would make them Irish. Sweet potatoes themselves have their origins in South America, so my guess is that it's more about the preparation and less about the main ingredient; this recipe calls for butter, flour, heavy cream, milk, all ingredients that one may find in scalloped potatoes, which *may* have an origin in Ireland. That's my most educated guess.
Another neat little tidbit is that sweet potatoes are high in complex carbs, fiber, and loads of other goodies the translation of which is that they are extremely good for you. How good for you they are after drowning them in whipping cream and butter isn't important right now. The point is that the decision on what to bring was made, and delicious consequences ensued.


It was my great pleasure to attend the completely delicious St Patty's day party held by my dear friends Jeff and Robin last Saturday. Given that it's a party, especially one given in honor of a dude who drove snakes out of Ireland a la Samuel L. Jackson, how can one not bring food?I decided from the get-go that I wanted to make something different. Something homey and delicious, but devoid of potatoes since I knew they'd be prevalent (this comment should not in any way be construed as "oh look at me, I don't eat potatoes" because that simply isn't true. In fact, I'm eating a potato right now. Raw). But I still wanted to maintain the ethnicity in some way, which meant that my typical dates-stuffed-with-goat-cheese appetizer (ooooh that's a post all its own!) was out. Eventually after googling Irish side dishes I stumbled upon a recipe for a Sweet Potato Bake. I know I'm not alone in saying "I LOVE sweet potatoes!!!"
You may be asking yourself "how are sweet potatoes Irish?" Well, dear reader .... they're not and I was just as baffled as you are as to what about them would make them Irish. Sweet potatoes themselves have their origins in South America, so my guess is that it's more about the preparation and less about the main ingredient; this recipe calls for butter, flour, heavy cream, milk, all ingredients that one may find in scalloped potatoes, which *may* have an origin in Ireland. That's my most educated guess.
Another neat little tidbit is that sweet potatoes are high in complex carbs, fiber, and loads of other goodies the translation of which is that they are extremely good for you. How good for you they are after drowning them in whipping cream and butter isn't important right now. The point is that the decision on what to bring was made, and delicious consequences ensued.
I found this recipe at littleshamrocks.com. More specifically here: http://www.littleshamrocks.com/Irish-Side-Dish-Recipes.html#IrishSweetPotatoBake

8 c. sweet potatoes, peeled and sliced very thin
6 tbsp. butter
1/2 c. flour
2 c. heavy cream
1 c. milk
1/2 c. brown sugar
Oven 350 F
Place potatoes in 3-4 quart casserole. In saucepan, melt butter, stir in brown sugar until dissolved. Stir in flour, then gradually add cream and milk. Bring to a boil over medium heat until thickened. Pour sauce over potatoes. Place casserole on a cookie sheet and cook covered at 350F for 1 hour. Remove cover and cook for another 30 minutes. Remove from oven. Yield: 12 servings

I was amazed at the amount of sweet potato it actually took to come to 8 cups; only two huge potatoes! I'd bought and peeled five just to be safe, so I had plenty of extra which I froze until such time as the world (or more importantly my sweet tooth) needs them. The preparation was remarkably and blissfully easy using the blade feature on my trusty food processor (I'm not a fan of chopping...I just don't have the knack!). It got the potatoes to the perfect width and took all of 15-20 minutes including the peeling and cutting pieces to fit through the portal, so I'd say this is definitely the way to go.
I followed the recipe exactly regarding the cream mixture and I would say that constant stirring is essential. There is an odd satisfaction with working with whipping cream since there is a moment when it is liquid, and then suddenly it isn't; the moment of "catch" as it were. I'd say immediately after boiling, it must be removed from heat and poured over the potatoes. I've only done this once, but the burn probability seemed extremely high. At first I was a little concerned since the cream mixture just sort of sat on top, but of course it was all for naught. As it baked, everything sunk in perfectly and away we went.
I had to run for a few hours, so I didn't get to see the initial reaction of the beloved masses as they sunk their teeth into the concoction, but I have it on good authority that it was well received :-) Oh, and it's great for leftovers. It doesn't need much heating up, and it's also pretty good cold!
Much love,
Helen
Tuesday, March 23, 2010
Soda Bread
When I saw that stew and corned beef were on the menu for our St. Patrick's Day festivities, I new right away that an Irish Soda Bread was in order. Then I got to thinking, if one soda bread is good, then two soda breads must be great! I did a quick search online and came up with a pretty basic herby soda bread recipe. For the second bread, I left out the herbs and added giant handfuls of shredded cheddar cheese. I think the cheesy one was a bit more popular, and beautiful, but next time I would opt for a sharper cheddar and perhaps a head of roasted garlic thrown in as well. Whatever you do to modify this bread with add ins, mix them with the dry ingredients before adding the buttermilk/oil. Also, my food processor did a decent job at mixing the dough, but eventually it just became too much for it. I simply kneaded the bread a bit longer to make sure the ingredients were all well combined.

Basic Soda Bread

Ingredients:
4 cups bread flour
3 teaspoons baking powder
1 teaspoon salt
1/2 teaspoon baking soda
1 1/2 cups buttermilk
1/4 cup vegetable oil
1 egg yolk
1 tablespoon water
3 teaspoons baking powder
1 teaspoon salt
1/2 teaspoon baking soda
1 1/2 cups buttermilk
1/4 cup vegetable oil
1 egg yolk
1 tablespoon water
Preparation:
Preheat the oven to 325°.
1)In your food processor or mixing bowl, combine 4 cups flour, the chopped herbs, baking powder, salt, and baking soda. Mix for 1 minute. If you are adding any extra flavorings, add them now.
2)Whisk together the buttermilk and vegetable oil in a bowl. Gradually add the buttermilk mixture to the combined dry ingredients while mixing on low speed and continue to mix until the dough forms a ball, about 30 seconds.
3)Scrape the dough away from the sides of the food processor and turn the dough ball over. Mix on low speed for about 30 seconds longer.
4)Transfer the dough ball to a floured surface and knead until smooth, about 2 minutes. Form the dough into a round loaf, pinching and twisting the bottom a bit to make the loaf taller. Place the loaf, pinched side down, on a baking sheet lined with parchment paper or a nonstick silicone liner.
5)Whisk the egg yolk with 1 tablespoon water, then lightly brush the mixture over the top of the loaf. Score the loaf by cutting a 1/4-inch deep "X" into the top.
6)Bake the loaf in the preheated 325° oven for 55 to 60 minutes. The bread is done when a hollow sound is heard when the bottom is tapped with your finger. Allow the bread to cool to room temperature before slicing.
-For an Herby Bread add 1 heaping teaspoon of dried dill and thyme (one 1 heaping tablespoon of fresh) plus about four shakes of garlic powder. The original recipe also said to add an equal amount of tarragon, but I didn't have any on hand so I left it out.
-For a Cheesy Garlic Bread add about four giant handfuls of coarsely shredded cheddar cheese and one head of chopped roasted garlic. For roasting instructions check out this blog.
You can find the original recipe I used here.
Monday, March 22, 2010
Creamy Stuffed Strawberries
I know this isn't the best pic, but I was literally holding a friend back from eating one at the time!As I said in my last post, this weekend was filled with Irish goodness as we had a group of friends over for an evening of Guinness and savory foods from the Emerald Isle. While I’m not sure if stuffed strawberries are very Irish (hey I had made a loop hole for it by saying the savory foods were authentic), they are very delicious, so I threw them in with the appetizers. These are simple to make, impressive to look at and will quickly disappear once placed within reach of your guests. These would also make a great dessert for an at home romantic evening.
While I made up how to make these, the idea was not originally mine. An old friend of mine used to make a similar dish for potlucks and guarded the recipe with his life because he didn’t want anyone else to start bringing them. I had always respected his secrecy, until we stopped hanging out regularly and having said potlucks. One day I decided that I could probably guess the basic ingredients and gave it a go. Honestly, with these ingredients, it would be hard to make something that wasn’t to die for. Enjoy!
Stuffed Strawberries
Stuffing:
One 8 oz. package of cream cheese
¼ cup of powdered sugar
a few shakes of vanilla extract
While I made up how to make these, the idea was not originally mine. An old friend of mine used to make a similar dish for potlucks and guarded the recipe with his life because he didn’t want anyone else to start bringing them. I had always respected his secrecy, until we stopped hanging out regularly and having said potlucks. One day I decided that I could probably guess the basic ingredients and gave it a go. Honestly, with these ingredients, it would be hard to make something that wasn’t to die for. Enjoy!
Stuffed Strawberries
Stuffing:
One 8 oz. package of cream cheese
¼ cup of powdered sugar
a few shakes of vanilla extract
several splashes of milk
2 small packages of strawberries
½ cup of chocolate chips, or dipping chocolate
1) Wash strawberries and remove their tops and the white insides. Make sure strawberries are completely dry before moving forward.
2 small packages of strawberries
½ cup of chocolate chips, or dipping chocolate
1) Wash strawberries and remove their tops and the white insides. Make sure strawberries are completely dry before moving forward.
2) Use a hand mixer to combine the cream cheese, powdered sugar and vanilla extract. Add the milk a splash at a time until the mixture is completely smooth and just thin enough to squeeze easily through a piping bag. It should be similar to a thick frosting.
3) Use a piping bag or make your own out of a Ziploc bag to fill each strawberry with the stuffing.
4) Melt the chocolate either by following the instructions on the bag (if it’s melting chocolate) or using a double boiler.
5) Either dip stuffed strawberries in chocolate and place on wax paper to dry or use the piping bag method again to do some swirls of chocolate on one side of each strawberry. The second method is quicker and less messy, but it’s really a matter of personal preference and time.
6) Refrigerate the strawberries for half an hour to make sure the chocolate sets.
Notes:
-I bought three packages of strawberries and picked out the bigger ones and had about one package left over of smaller ones. They became part of a fresh fruit salad the next day.
-If you don't have a double boiler, fill a small pot a couple of inches with water and place a glass measuring cup with your chocolate in the pot. Presto! A homemade double boiler. Just be very careful not to get any water in with your chocolate.
Friday, March 19, 2010
Easy Roast Chicken
Hello friends, while I am preparing for a Saturday filled with lots of homemade Irish foods (which will all appear here next week), I wanted to share a new recipe I've found with you. Lately I've been cooking a lot more with bone-in chicken, as opposed to breast, and I'm always on the look out for a new easy recipe to try. This chicken recipe from David Lebovitz's blog would make a great addition to your reliable standby collection, perfect for both a casual mid-week dinner or for company. Although the baking time takes a little while, the prep is very simple. All you have to do is chop a few shallots and measure a few liquids and you're done; the oven does the rest! To make a simple meal you can also chop up some potatoes and roast them at the same time as the chicken.
I went ahead and made this recipe for Jeff and I and ended up with enough for two meals. I reheated it in the oven adding a dash of oil, vinegar and soy sauce to keep it moist and it was even better the second day.
Have a great weekend and happy cooking!
Roast Chicken with Caramelized Shallots
Serves 4 to 6
Adapted from French Farmhouse Cookbook (Workman) by Susan Herrmann Loomis
I use a whole chicken cut into eight pieces; two legs, two thighs, and I cut each breast piece in half, crosswise, keeping the wings attached. You could also just use eight of your favorite chicken pieces.
3 tablespoons olive oil
3 tablespoons red wine vinegar
1 tablespoon soy sauce
4 large shallots, peeled and minced
sea salt and freshly ground black pepper
One whole chicken, cut into 8 pieces
generous handful of coarsely chopped flat-leaf parsley
1. Preheat the oven to 425ºF (220ºC).
2. In a large baking dish, one which will hold all the chicken pieces in a single layer, mix the olive oil, vinegar, soy sauce, shallots, and some salt and pepper.
3. Toss the chicken in the mixture, so they're completely coated with the shallots. Turn the chicken pieces so they are all skin side up.
4. Roast the chicken for about twenty minutes, until it starts to brown on top. Turn the pieces of chicken over. Scrape any juices and shallots over the chicken that may be clinging to the pan, and bake for another twenty minutes, or until the pieces of chicken are cooked through and the shallots are well-caramelized.
5. Remove from oven and toss in the chopped parsley, then serve.
I went ahead and made this recipe for Jeff and I and ended up with enough for two meals. I reheated it in the oven adding a dash of oil, vinegar and soy sauce to keep it moist and it was even better the second day.
Have a great weekend and happy cooking!
Roast Chicken with Caramelized Shallots
Serves 4 to 6
Adapted from French Farmhouse Cookbook (Workman) by Susan Herrmann Loomis
I use a whole chicken cut into eight pieces; two legs, two thighs, and I cut each breast piece in half, crosswise, keeping the wings attached. You could also just use eight of your favorite chicken pieces.
3 tablespoons olive oil
3 tablespoons red wine vinegar
1 tablespoon soy sauce
4 large shallots, peeled and minced
sea salt and freshly ground black pepper
One whole chicken, cut into 8 pieces
generous handful of coarsely chopped flat-leaf parsley
1. Preheat the oven to 425ºF (220ºC).
2. In a large baking dish, one which will hold all the chicken pieces in a single layer, mix the olive oil, vinegar, soy sauce, shallots, and some salt and pepper.
3. Toss the chicken in the mixture, so they're completely coated with the shallots. Turn the chicken pieces so they are all skin side up.
4. Roast the chicken for about twenty minutes, until it starts to brown on top. Turn the pieces of chicken over. Scrape any juices and shallots over the chicken that may be clinging to the pan, and bake for another twenty minutes, or until the pieces of chicken are cooked through and the shallots are well-caramelized.
5. Remove from oven and toss in the chopped parsley, then serve.
Tuesday, February 23, 2010
Granola Round II

I took another stab at granola making the other night and I think this batch is by far superior to the first (although Jeff's shock and exclamation about how much better this one was made me question how much he actually liked the first batch). Not only did I not burn it, but I changed up a few of the ingredients or modified the amount of them. This granola was not sticky at all like the first batch. Enjoy!
Georgia Peach Granola
1/2 cup canned peaches liquefied in blender (use a little of the syrup too)
1/4 cup honey
splash of no sugar added banana syrup
1 tsp. vanilla extract
2 Tbsp. walnut oil
2 Tbsp. cinnamon
1 tsp. ginger
1 tsp. nutmeg
1 tsp. cardamom
2.5 cups of rolled oats
1 cup chopped almonds
2 cups chopped walnuts
1 cup chopped almonds
2 cups chopped walnuts
dash of salt
3/4 cup chopped dried apricots
3/4 cup dried cranberries
1.) Preheat oven to 300, and mix all ingredients in the first group listed above in a blender until liquefied and well mixed.
2.) In a separate bowl, mix together all the ingredients in the second group listed above. Then add the wet ingredients to the bowl and stir until the granola is evenly coated.
3.) Spread mixture onto two cookie sheets and place them on the rack/racks (depending on the size of your sheets and oven) farthest from the heat source in your oven. Bake for 20 minutes stirring three times.
4.) If you are using two racks, rotate the racks and cook for 10 more minutes stirring twice (you will still cook for 10 more minutes even if using only one oven rack).
5.) Remove from the oven once your granola is nice and golden brown. Immediately pour the granola into a large bowl and add the chopped fruit. Allow it to cool completely before placing it in an air tight container.
Subscribe to:
Posts (Atom)